
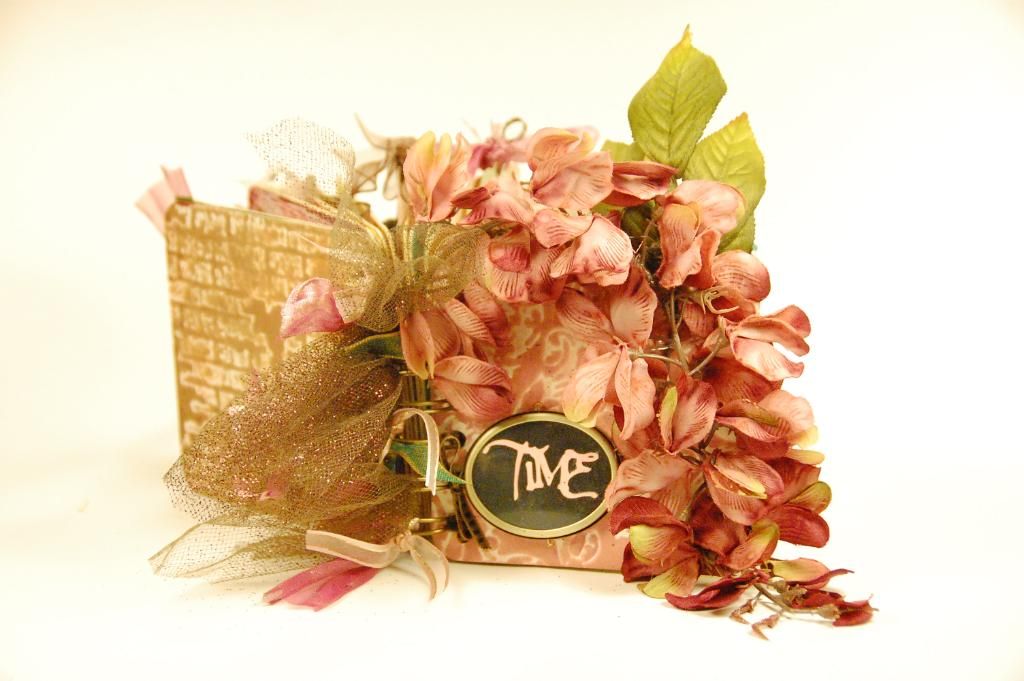
Hi everyone! This is Elizabeth from 217 Creations. I am Monique's Guest Designer today! I am head over heels for this mini album! I have over 30 pics to share plus a video! This entire mini is made using square coasters. I literally used EVERY Distress Ink color. I made it a point to mix and create rather than be systematic in my process. I find I create best when I let it just flow.
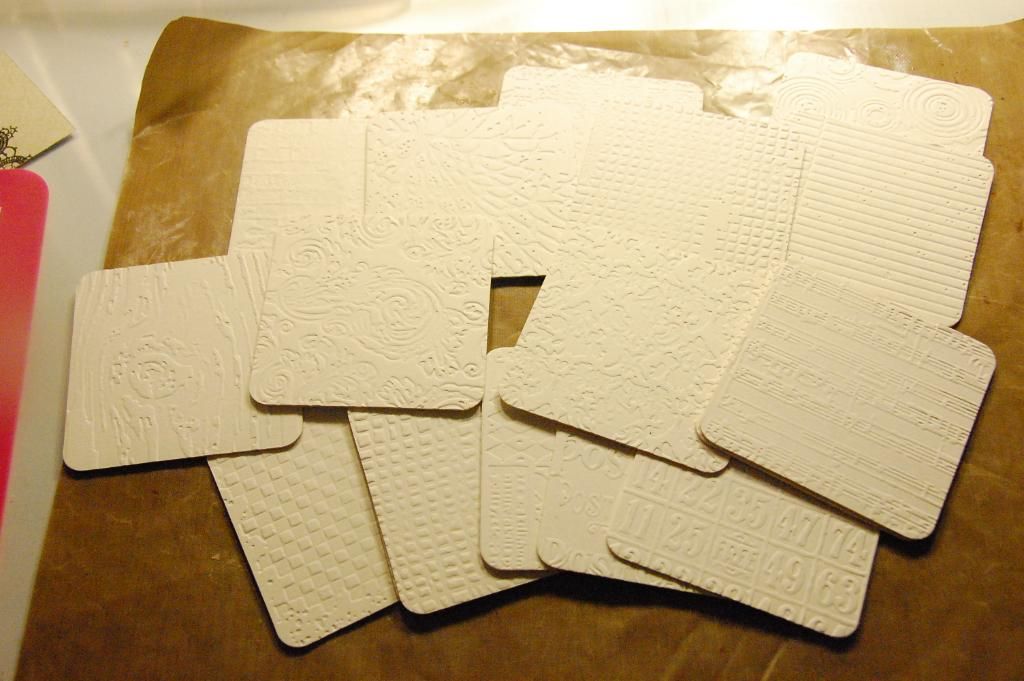
I started by embossing these square coasters with several embossing folders. Most of these are from Tim Holtz but I used my Cuttlebug to do the embossing. Because the the coaster material is thick, I got a nice deep embossing that is appealing to the eye and to the touch.

Next I dumped all my Distress Inks out (yes I own them all).
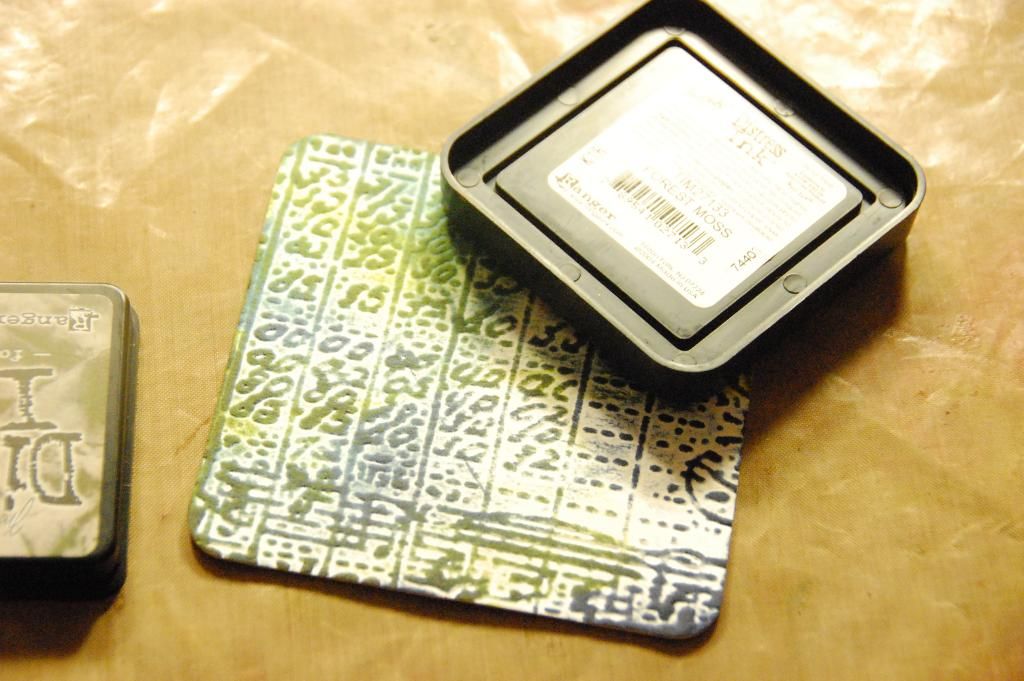
I began by swiping each coaster with the Distress Ink Pad directly. I did not use a sponge dabber or applicator for this process. I would highly recommend using a splat mat while you do this. I am not super picky when it came to my colors mixing. In fact, I wanted them to. So I did not "clean" between ink colors on my mat. The effect is beyond cool. So it maybe difficult to say which colors are specifically on each coaster page.
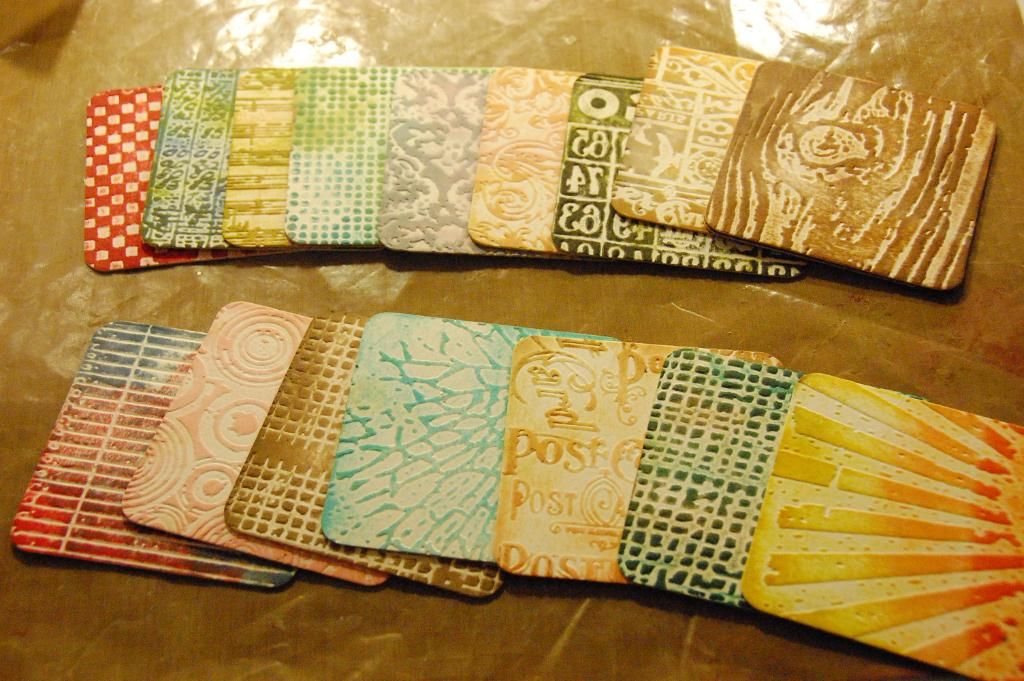
Here they are all embossed and inked. You will notice when you do the swiping how the embossing just pops out and becomes so defined!
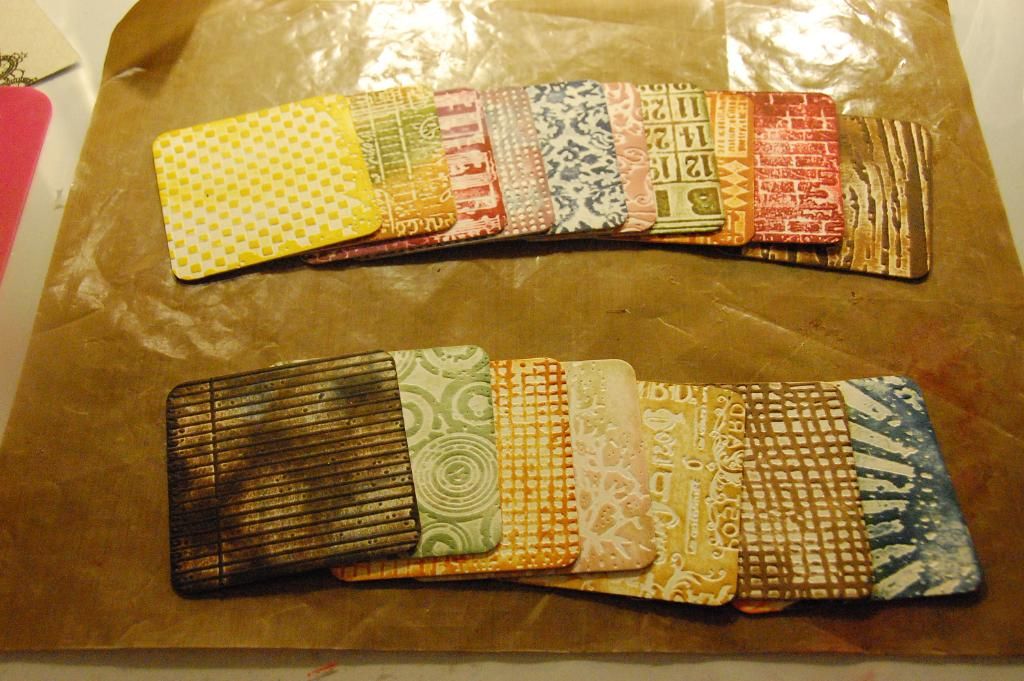
Here are the backsides. I made it a point not do the same the color combination throughout the album.
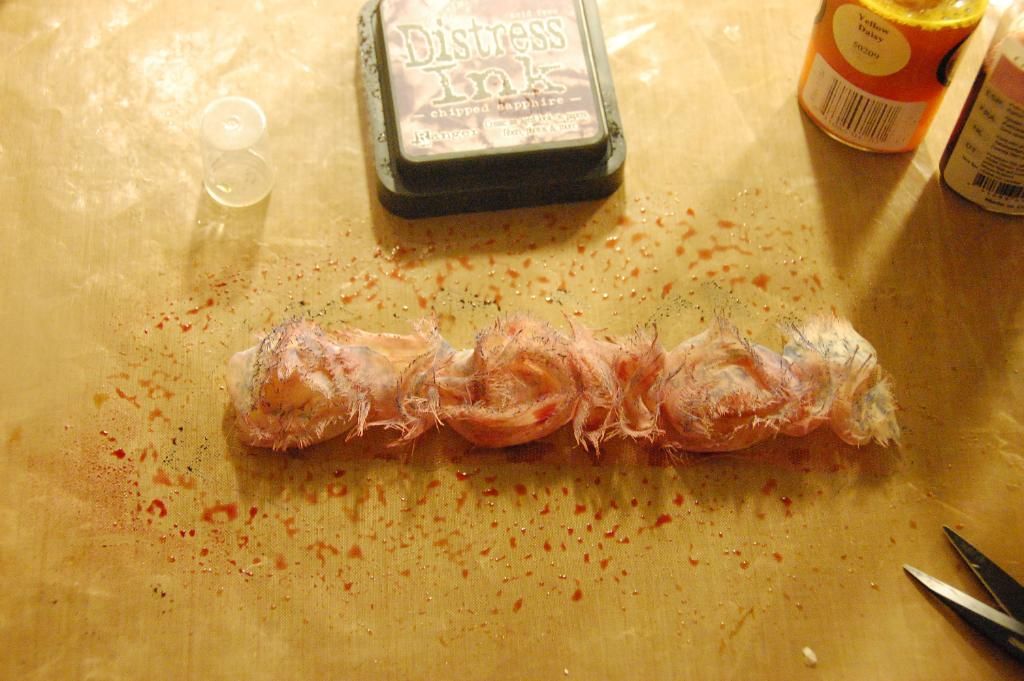
All the ribbon is from my stash, as well as most of the findings! What I love about this size of mini, I can use lots of scraps to complete the project! To tint these rosettes, I spray Sapphire Glimmer Mist, Yellow Daisy, Wheatfields, and Cranberry Zing. Then I pressed a little Chipped Sapphire Distress Ink into the ribbon.
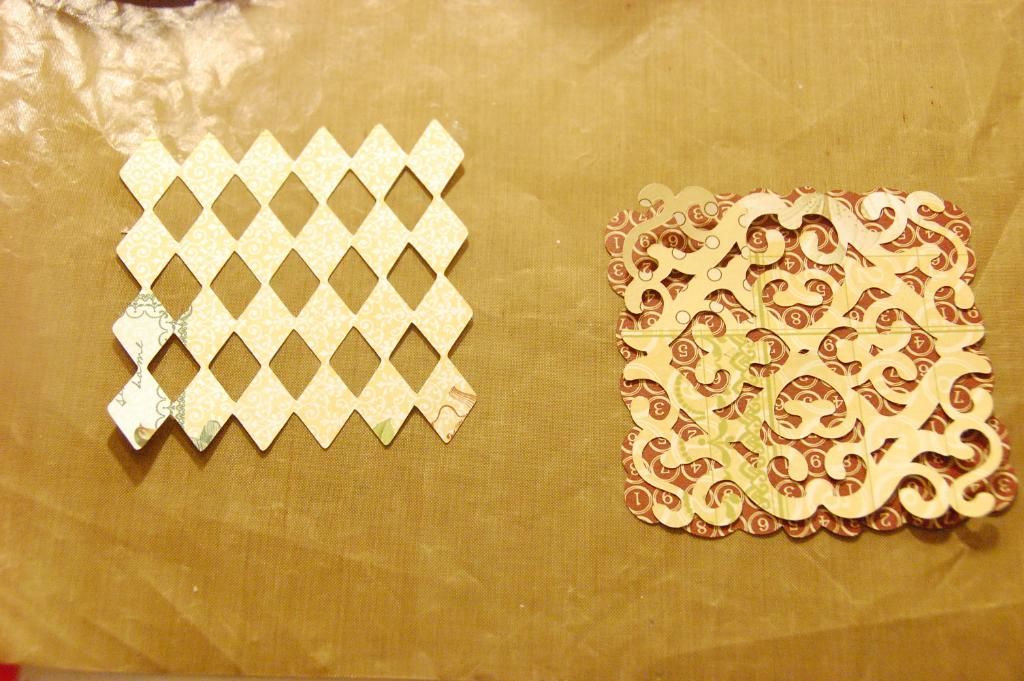
All the paper is from Webster's Pages. These cuts are from Paper Lace.
The argyle looking cut is cut at 3.35 inches (real size off). The scrolling and its shadow are cut at 3.83 inches (real size off).
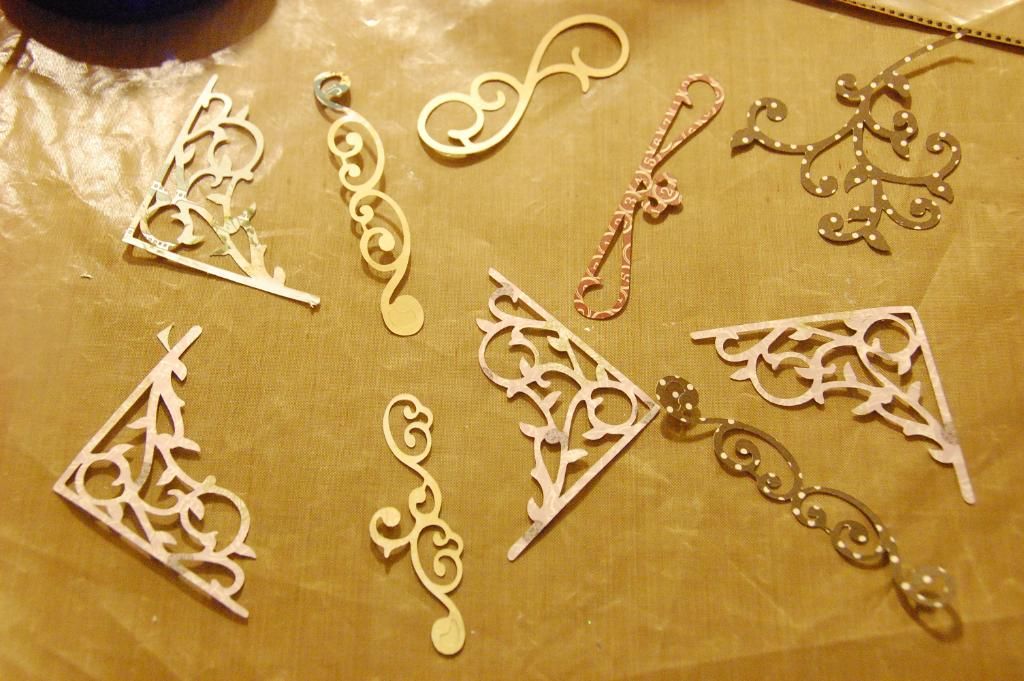
These are from Heritage. The corners are cut at 2.42 inches (real size off). The various scrolls are all cut at (real size off):
A-1.0 inches
B- .61 inches
C- 2.06 inches
D- .61 inches
E- 3.12 inches
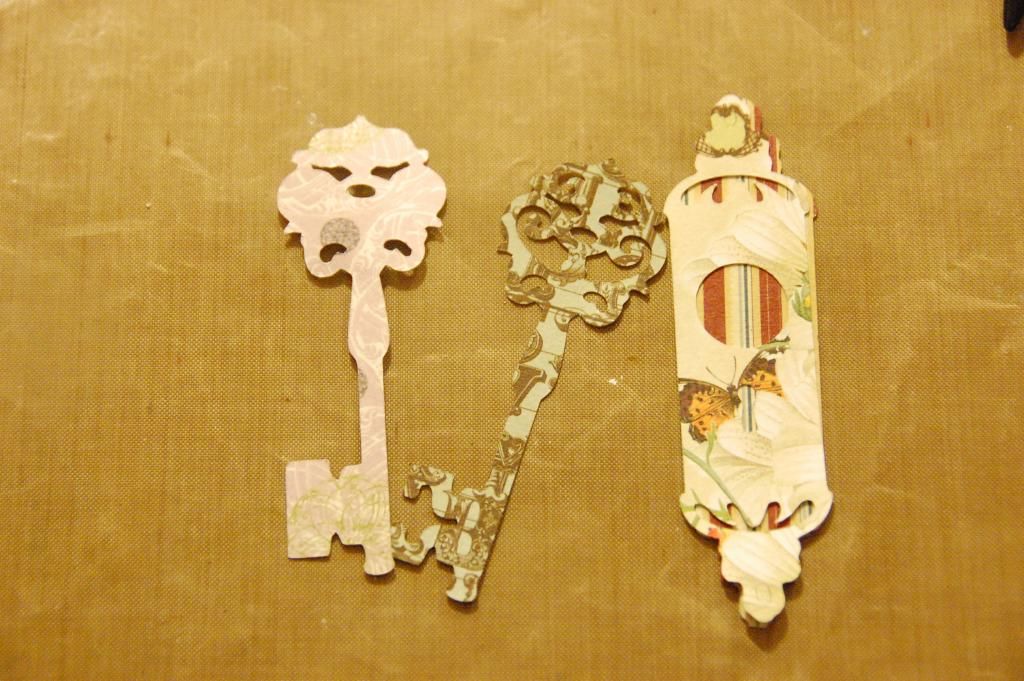
These are from Sentimentals.The key and it shadow are cut at 3.35 inches (real size off). The keyhole and its shadow are cut at 3.82 inches (real size off).
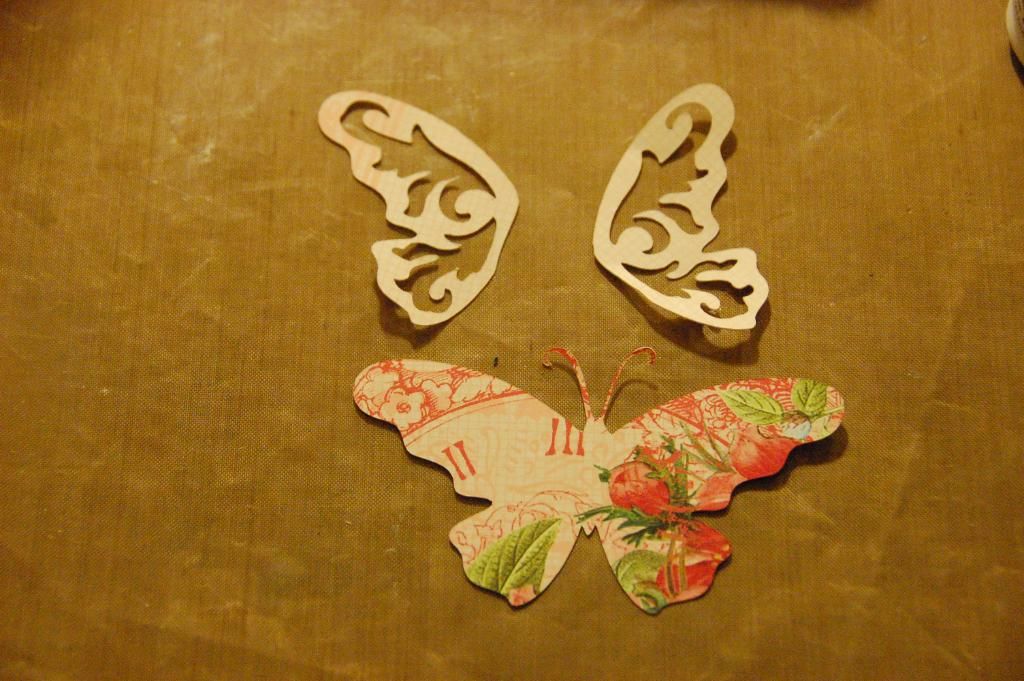
This Butterfly is also from Sentimentals at 2,18 inches (real size off)
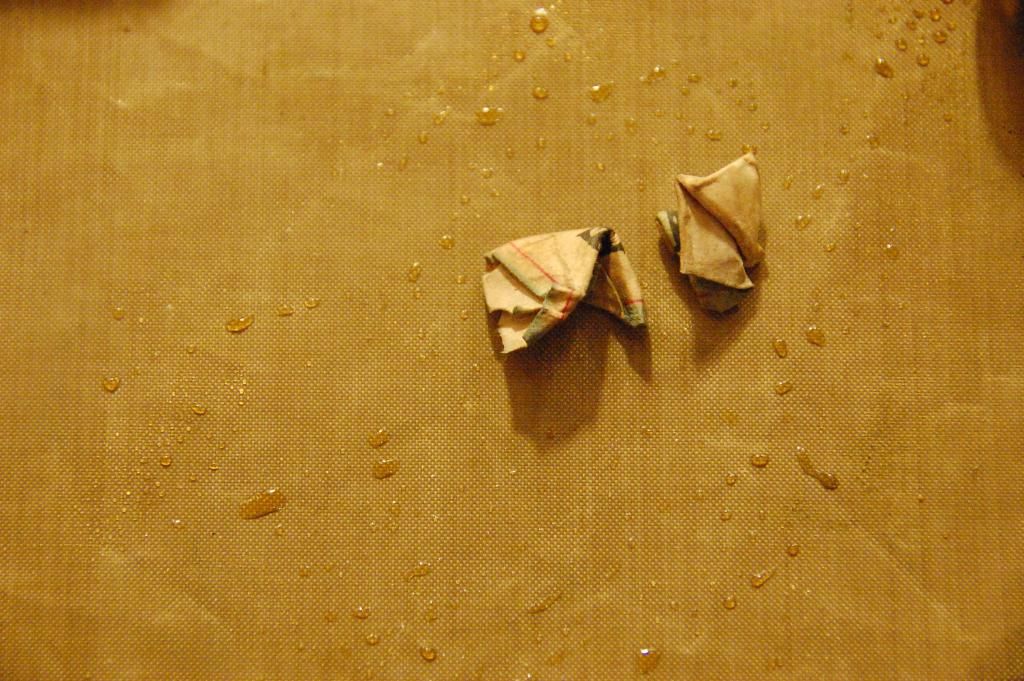
Next I worked on some Tim Holtz Addage Tags. I inked them up, sprayed with Wheatfields Glimmer Mist, Crumpled and let dry.
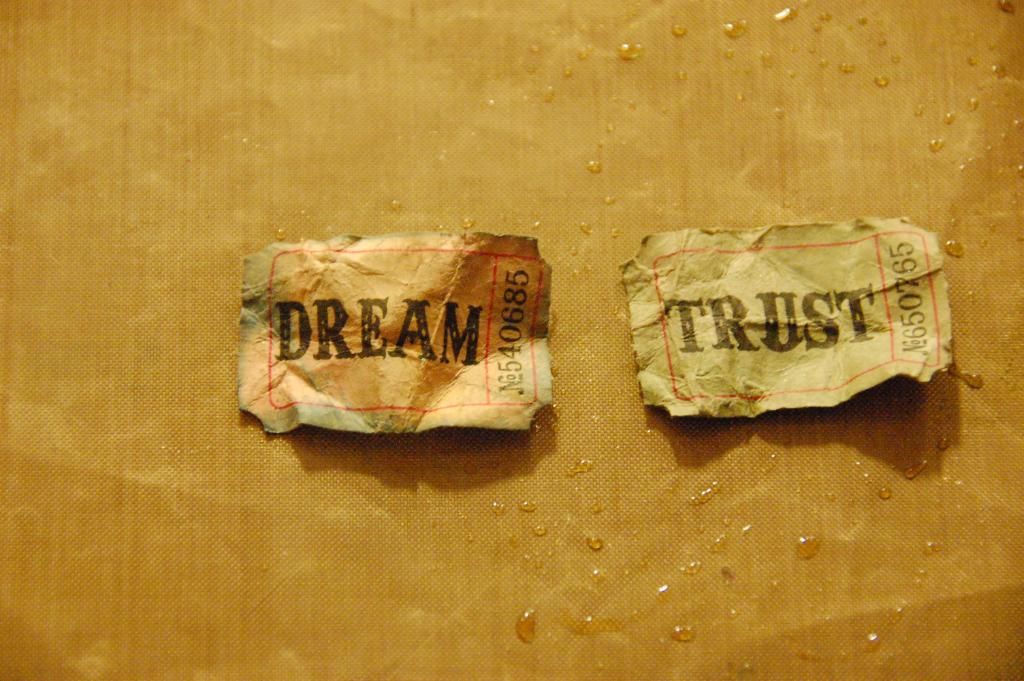
Then unfolded and - tattered old looking paper! LOVE IT!
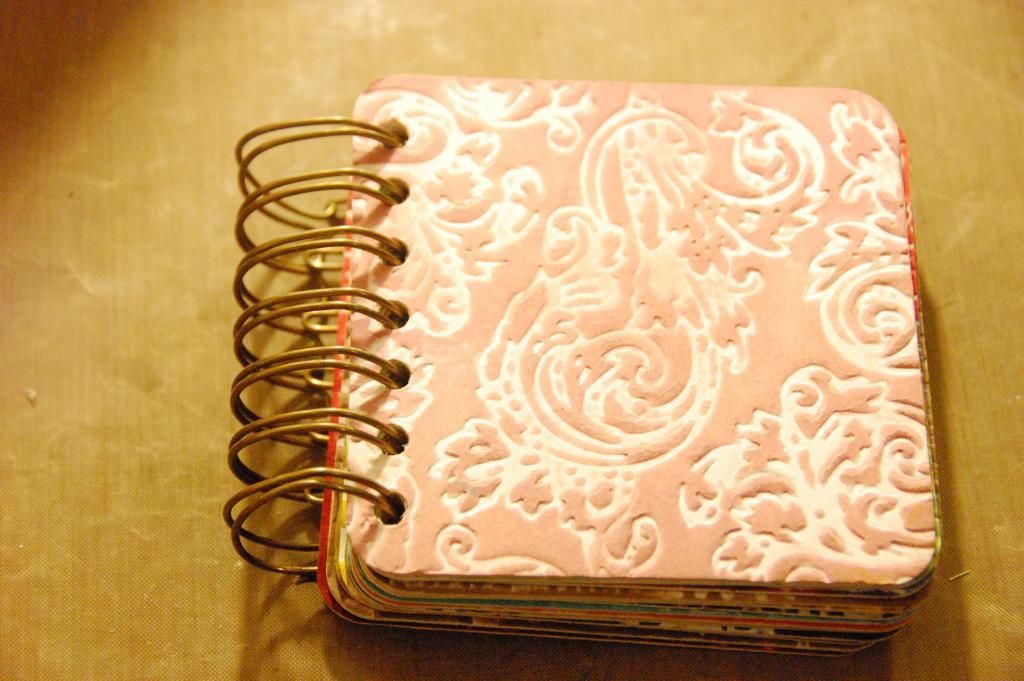
While everything was drying, I bound my coaster pages with the Cinch. I used a 1.25 inch ring in Antique Brass. I have gotten pretty good at my CInch but every now and then- OOPS!
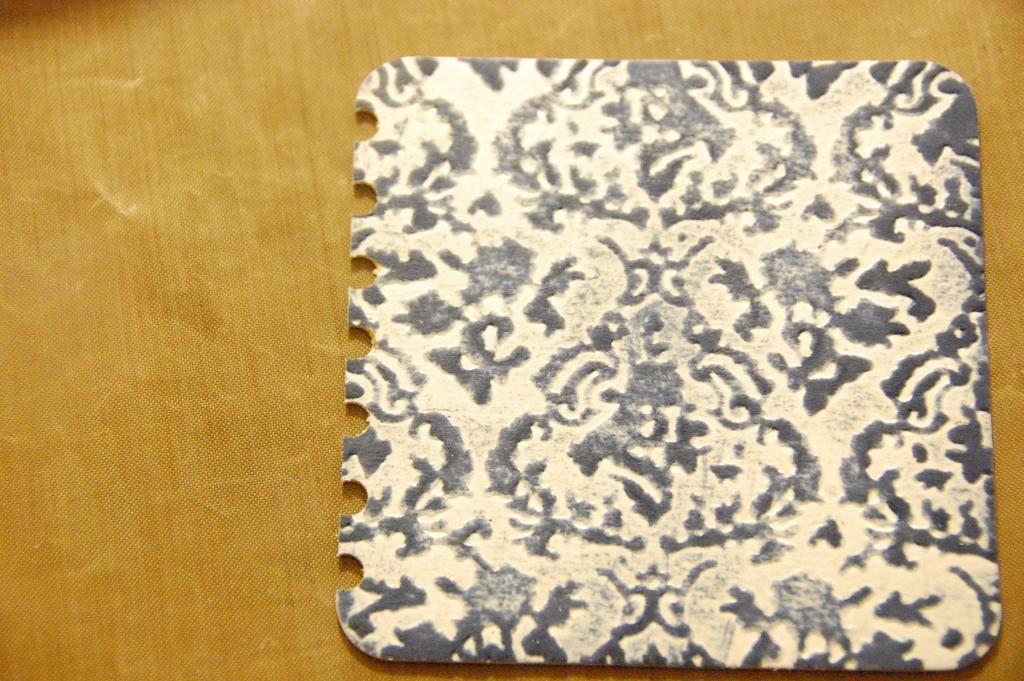
This is an "OOPS!". I got going too fast and did not push the coaster all the way into the machine.
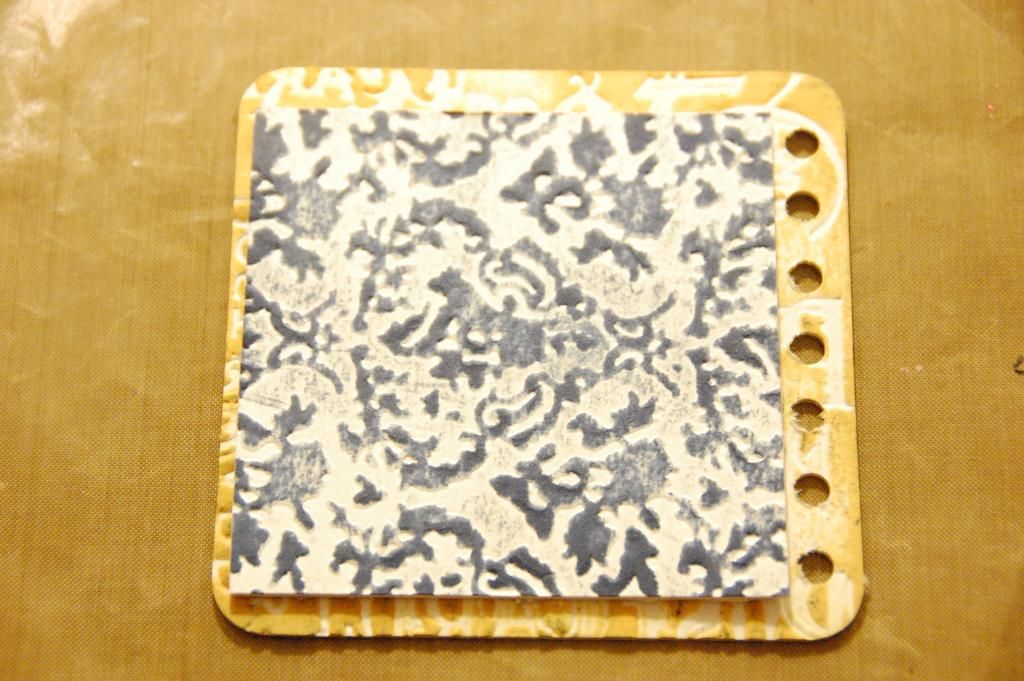
I could not bare to throw away the coaster, so I cut it down to size and used it as a mat for another page.
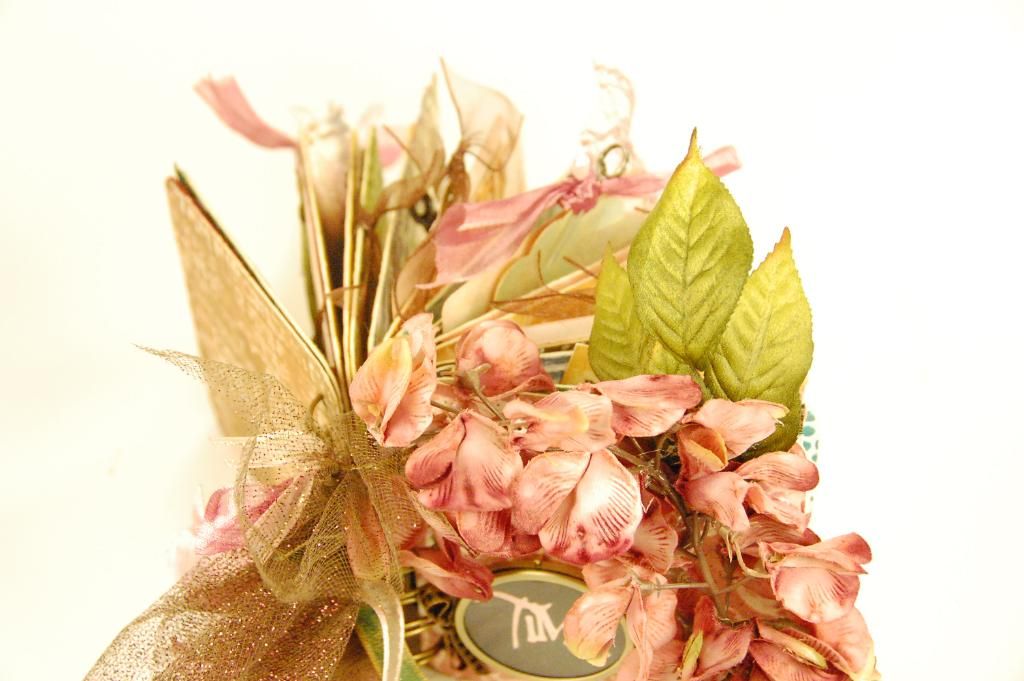
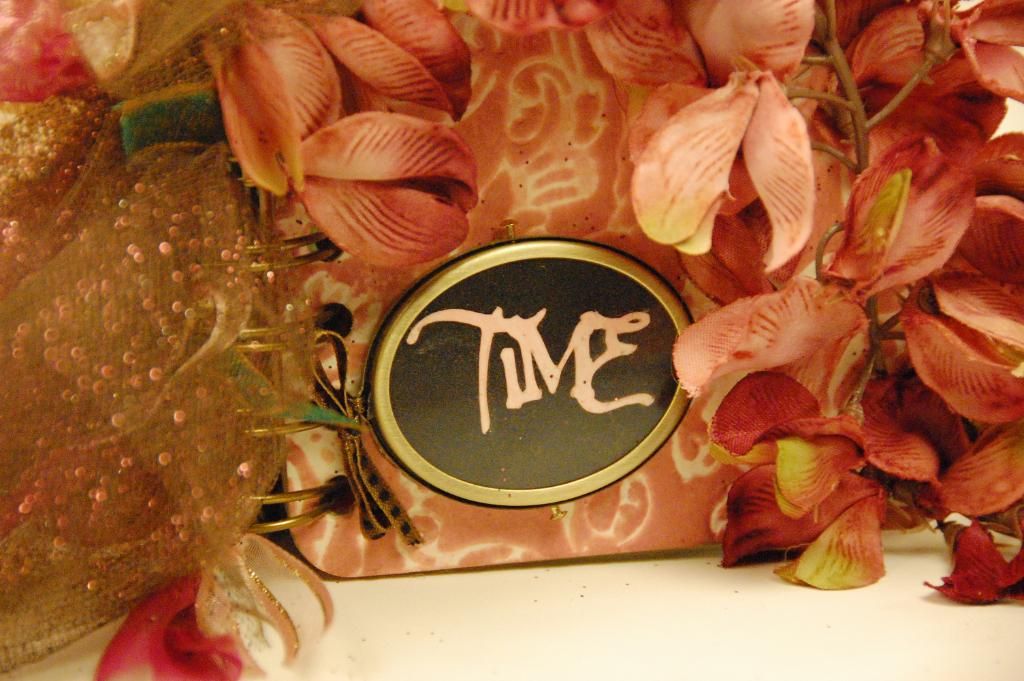
Finally I added all my embellishments to my pages and then began work on the cover. I used a floral spray from Hobby Lobby. I actually "threaded it down the spine inside the binding. I used hot glue to hold it down in select areas. Once the flowers were dried, I tied all my ribbon along the side. I used several pieces of glittered tulle. I also added the charm that says "Time"
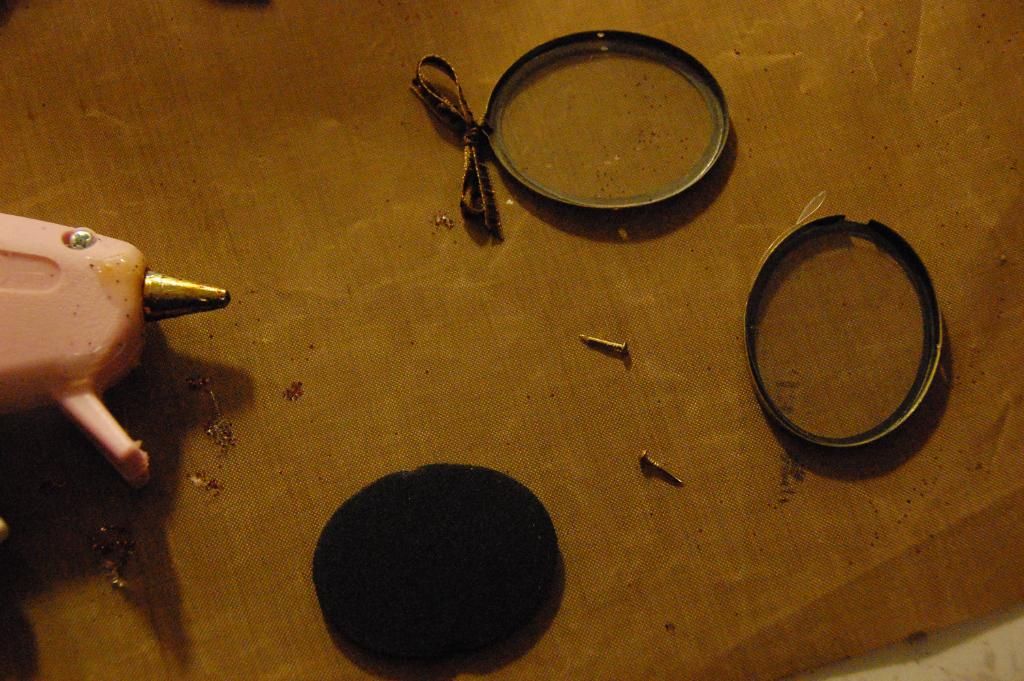
This cut is from Gypsy Wanderings at .76 inches (real size off). I took an old mini frame and disassembled it. I adhered the cut insdie then closed the frame back up. I also tied a small ribbon through the top.
Then I hot glued it to the album cover.
So do you want to see it in action? Watch the video!
Here is some eye candy for you! Each page is distinct. As I said in the beginning, I cannot guarantee which colors are on which pages because of the swiping method I used. I have some notations on materials that I have used.
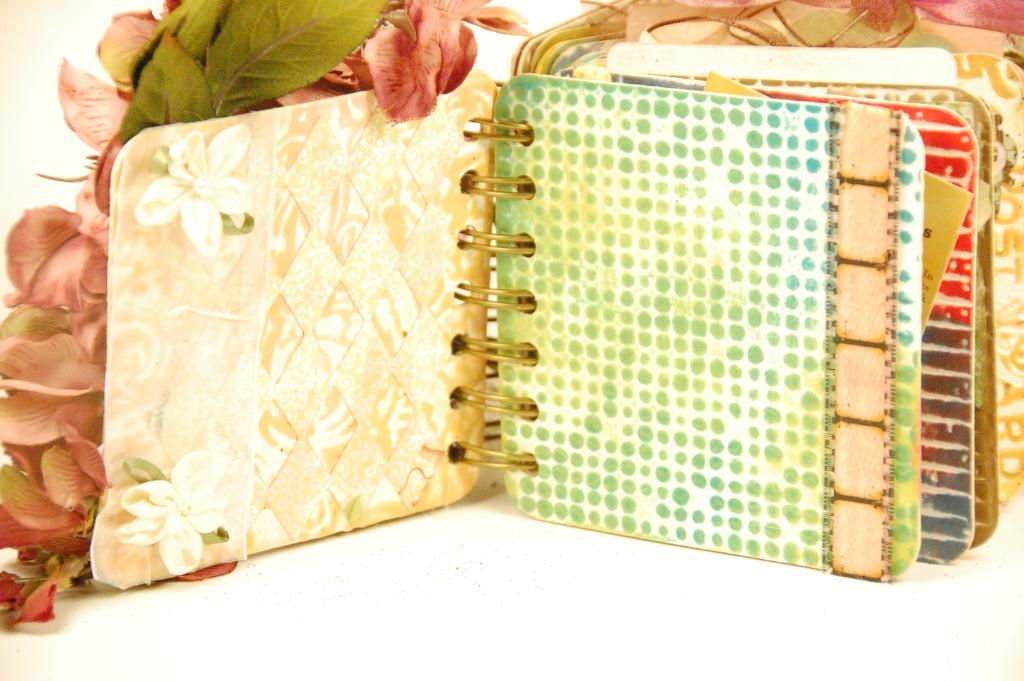
The satin flowers on the left page are form Hobby Lobby. I bought it by the yard. On the right hand side, I used Victorian Velvet Distress Ink to tint some twill ribbon. Then I used Terrifically Tacky Tape to stick it down. Finally I used some Film Strip Ribbon from Tim Holtz on top. To adhere the film strip to the ribbon, I used Tombo Vellum runner.
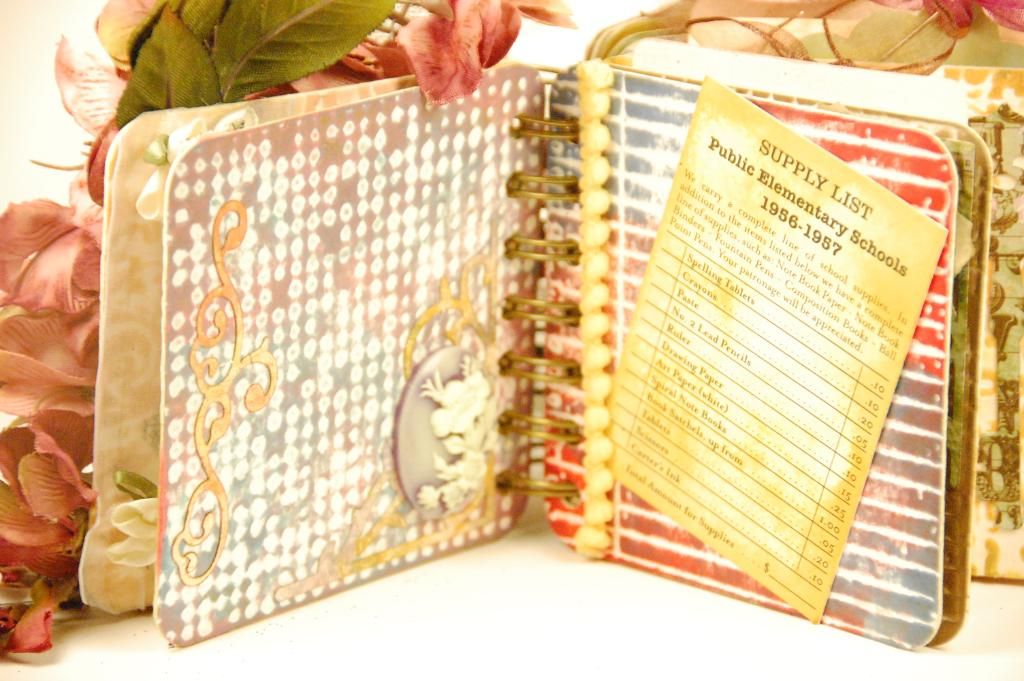
The left hand side has my cuts from Heritage as well as a Webster's Pages cameo. The right hand side is a card from October Afternoon.
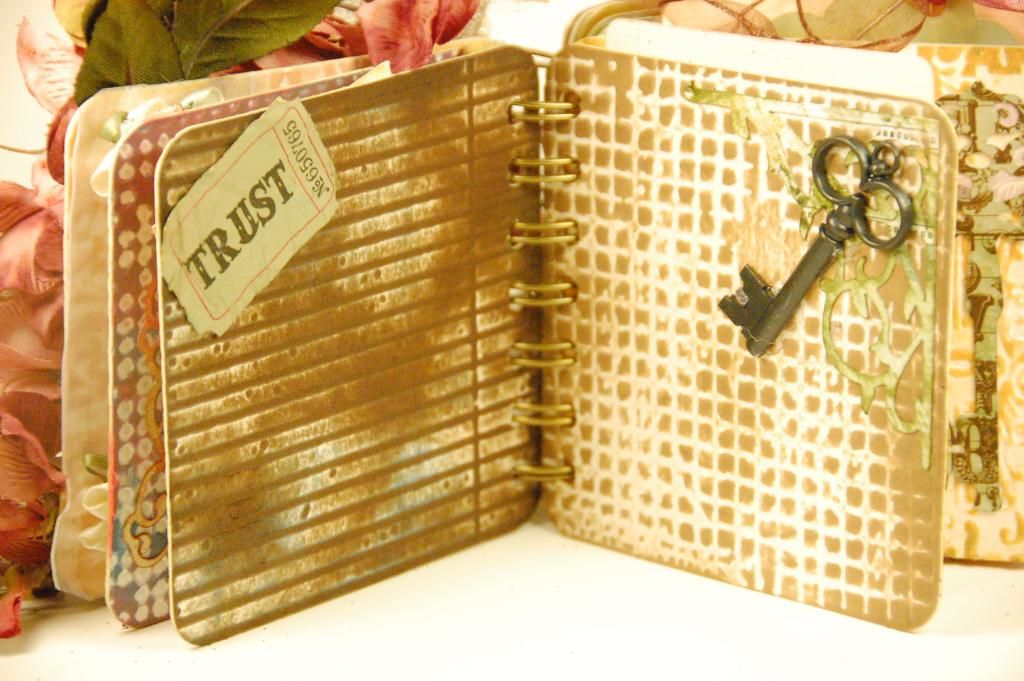
Left side has the addage tag and the right hand side has a metal key from my stash with a corner cut from Heritage.
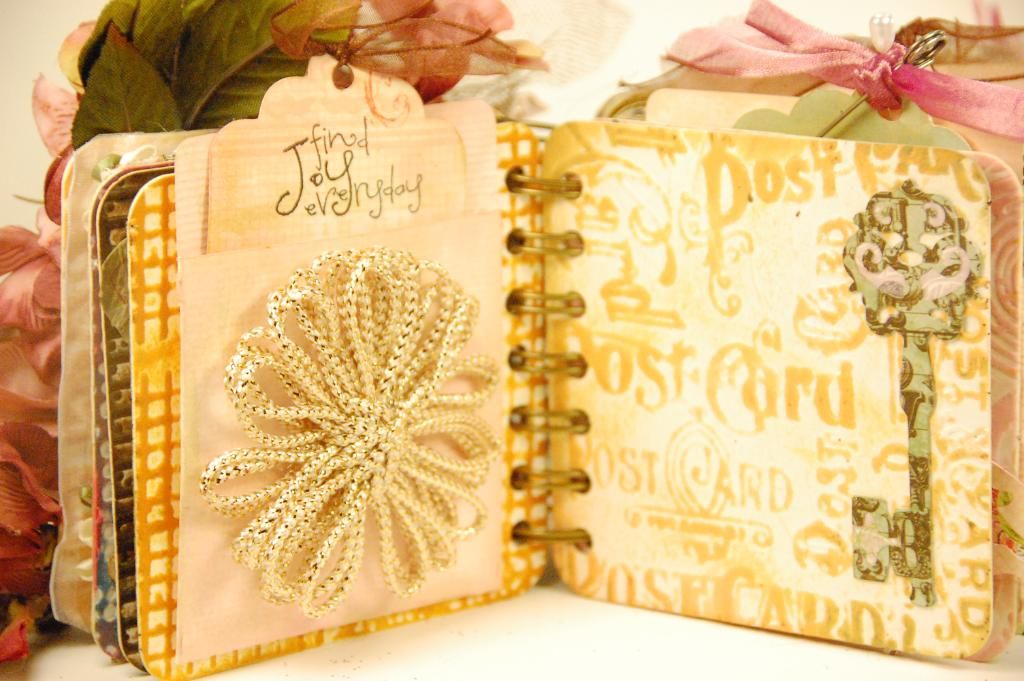
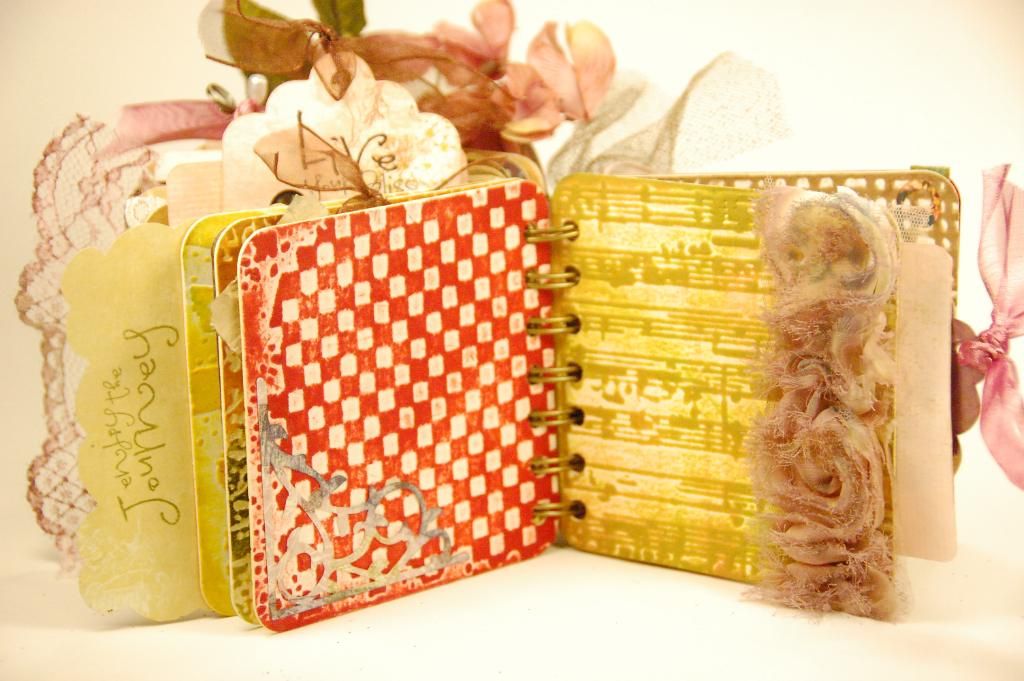
The flower is actually made from the Knifty Knitter. The pockets are from Sentimentals. I cut them at 3.82 inches (real size off). The tag is also from Sentimentals. It was cut at 4.06 inches (real size off). The tags were stamped with sentiments from Pink By Design "Enjoy the Journey"
So pretty!!! I love the layering!

I used some metal washer on this page with a random number disc that I got out a rummage bin at a scrapbook store.
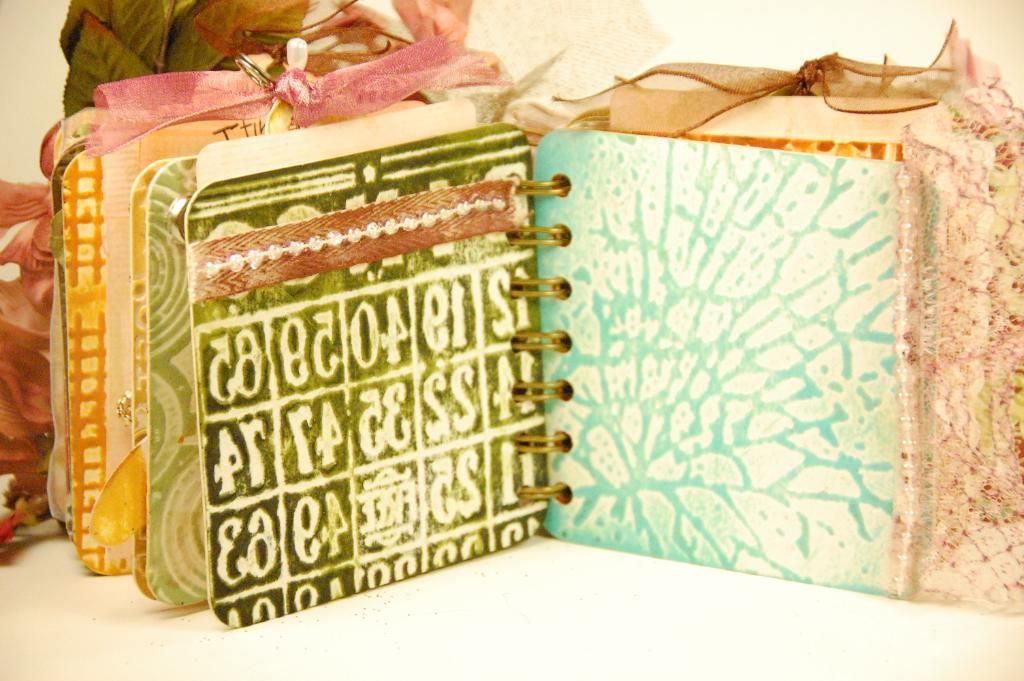
I layered twill ribbon that was swiped with Aged Mahogany Distress Ink and then I hot glued a line of beads. On the right hand side, I used TTT (Terrifically Tacky Tape) to hold the lace on the edge. The lace is tinted with left over ink and Glimmer Mist form my mat.
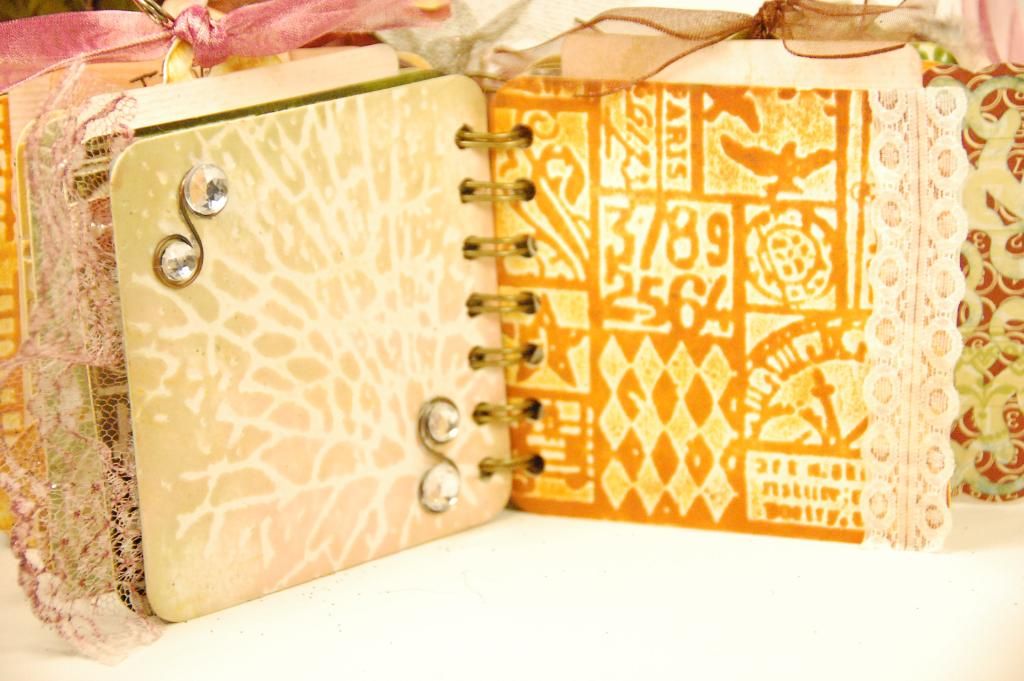
On the left I added some metal swirls and rhinestones to add some Bling! The right hand side I added small strip of stretchy lace. Once again I used TTT to adhere the ribbon the the page.

The tag's sentiment is again from Pink by Design "Enjoy the Journey". The sayings on the front of the pocket are actually a rubber cling I have from Tim Holtz. I love those metal clips at add pics and findings! The right hand side is one of my favorite parts of this album. It over hangs the side a bit so there is a small "tab" hanging out. On the backside of the "tab" . . .
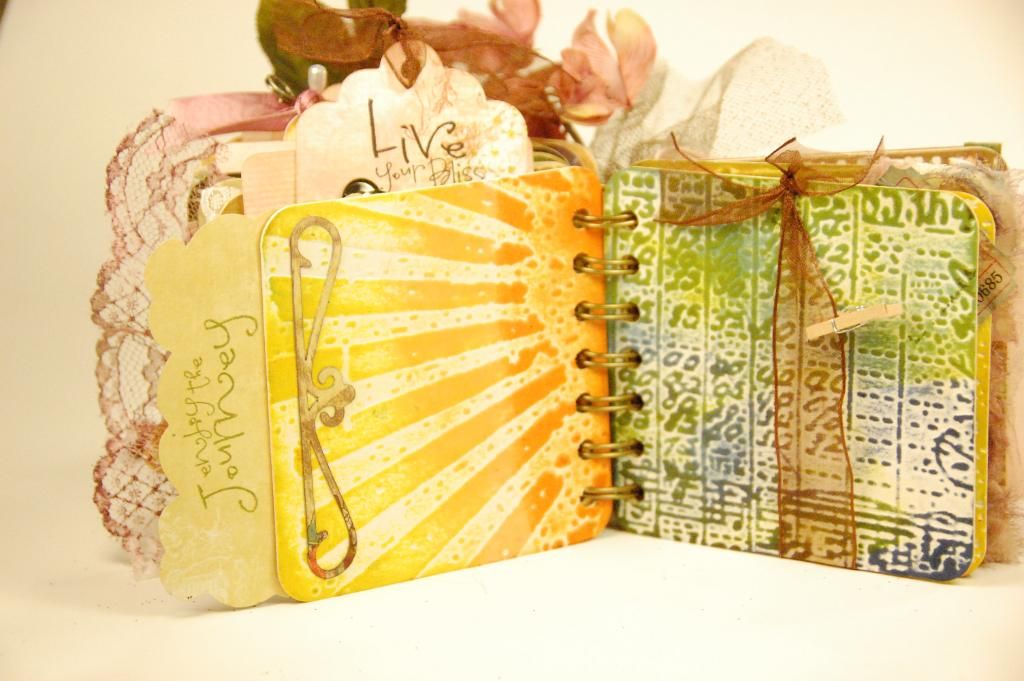
I stamped "Enjoy the Journey" from Pink By Design. I also added a cut from Heritage. The right hand side, I wrapped a ribbon around and added a mini clothespin.
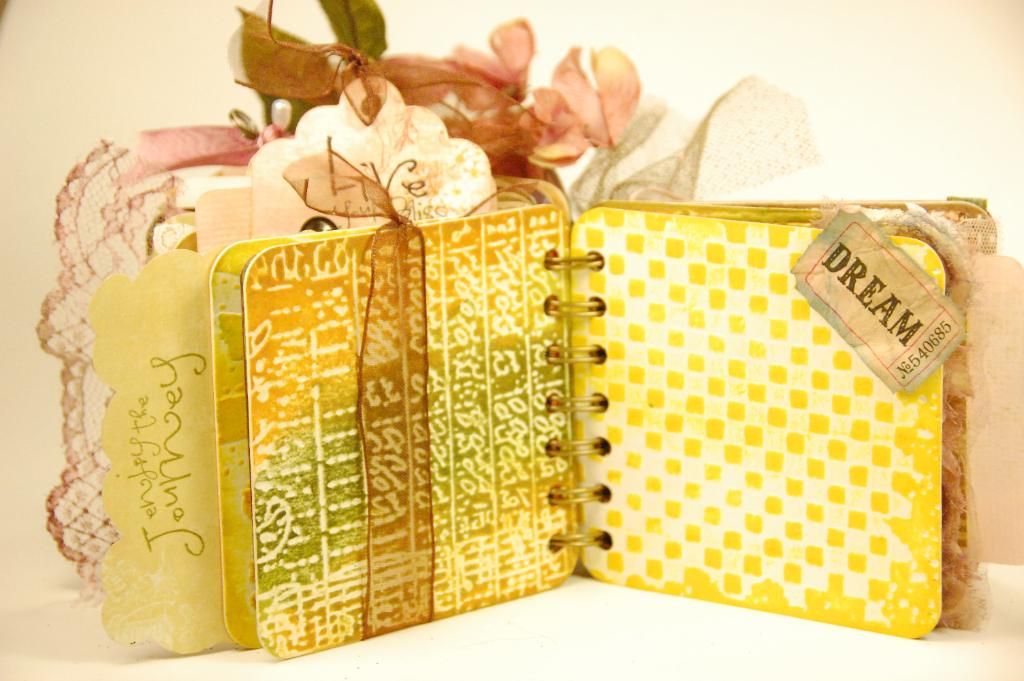
I added the addage tag "Dream" to the right hand side.
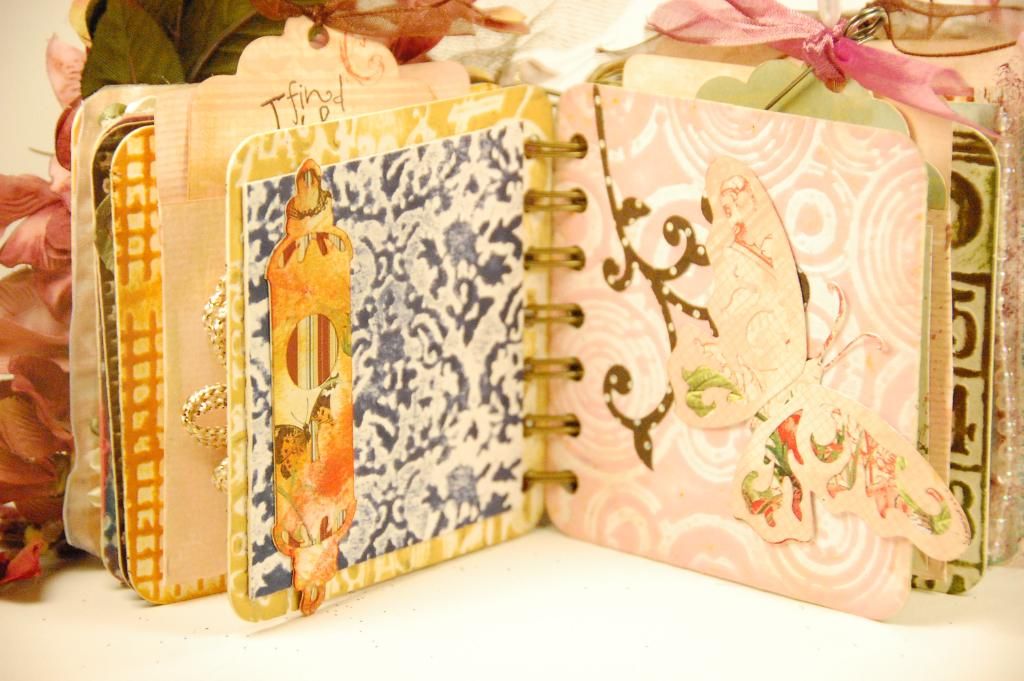
On the left, I adhered a cut from Heritage and on the right I added the tinted rosette ribbon.

On this pocket and tag, I added a silk orchid and some greenery. On the right I added a scrolled cut from Heritage.
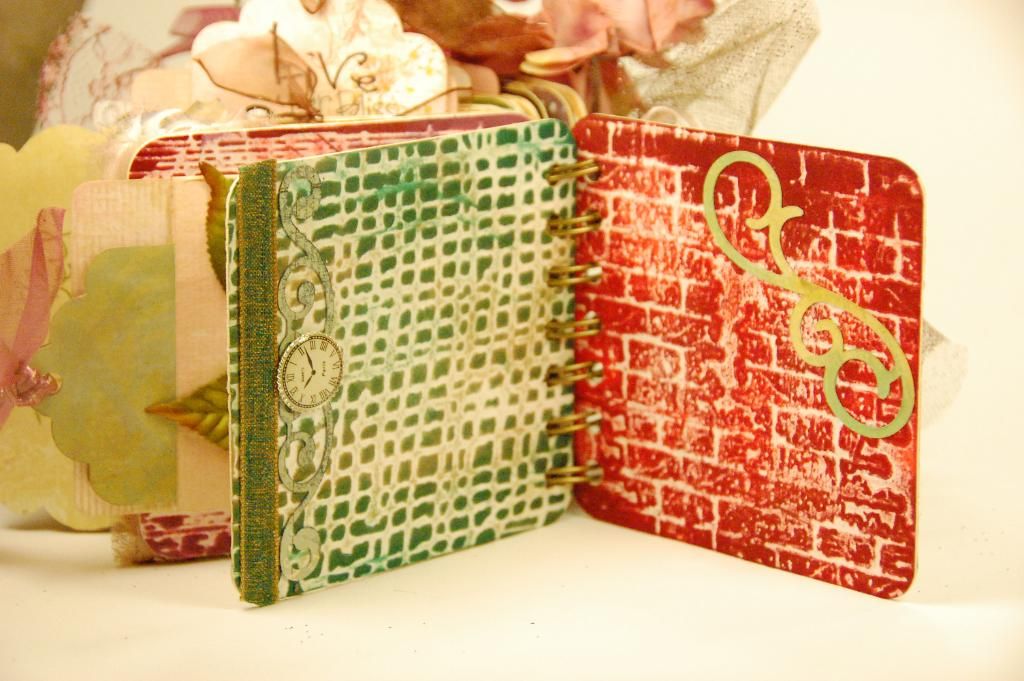
On the left I added a strip of ribbon and then the scrolling from Heritage. Then I added a mini clock that I bought from a mixed lot off ebay. On the right I added another cut from Heritage.
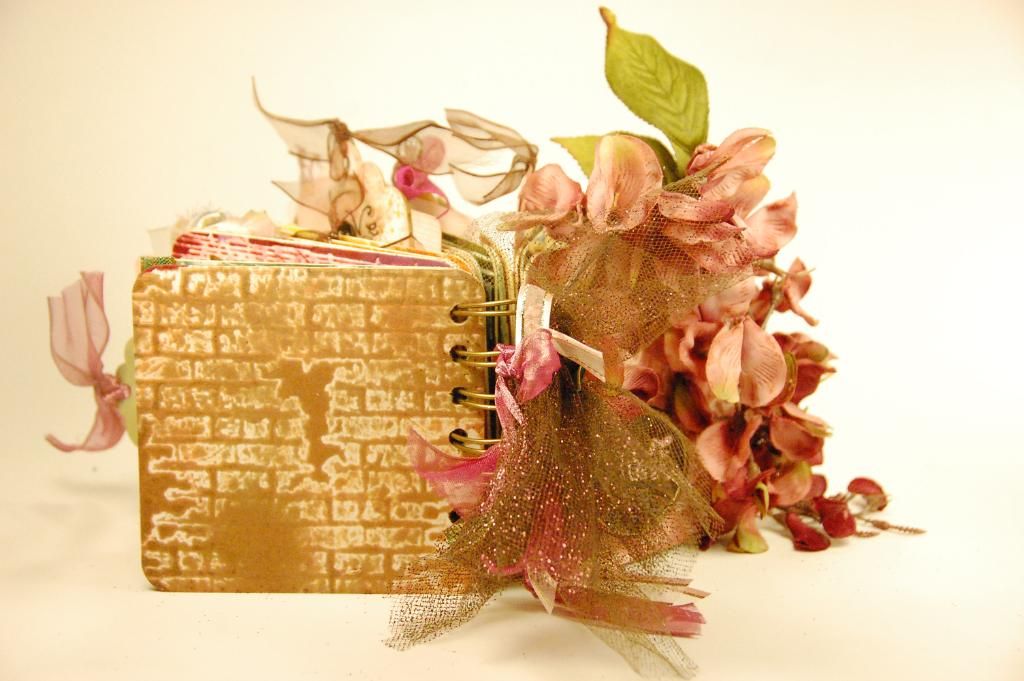
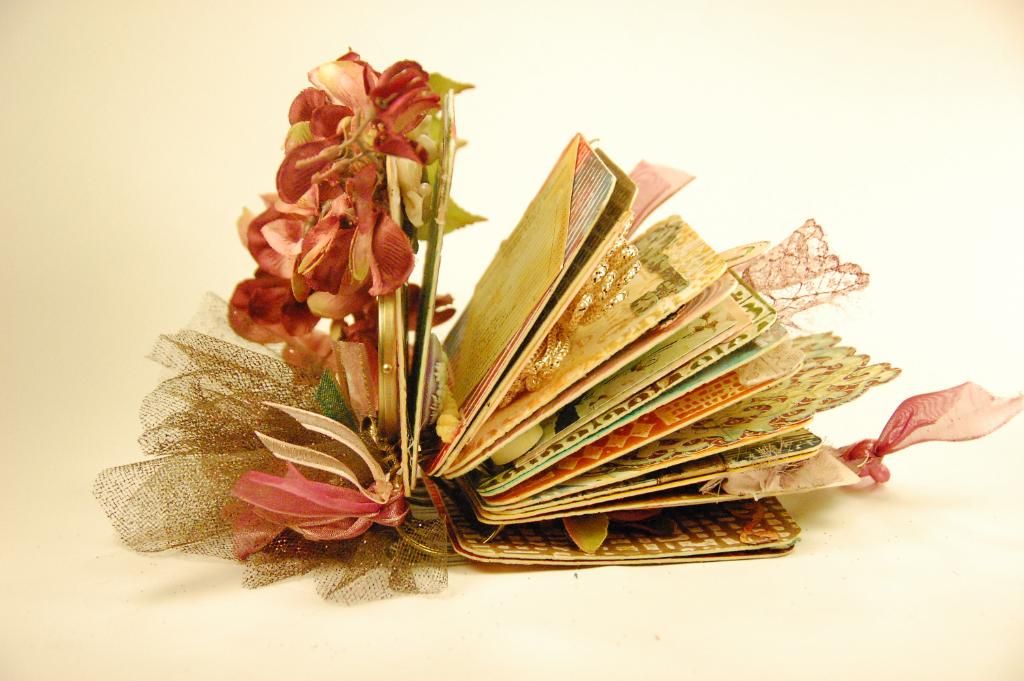
This is the back cover. I love how this mini can stand as piece of home decor or art for display.
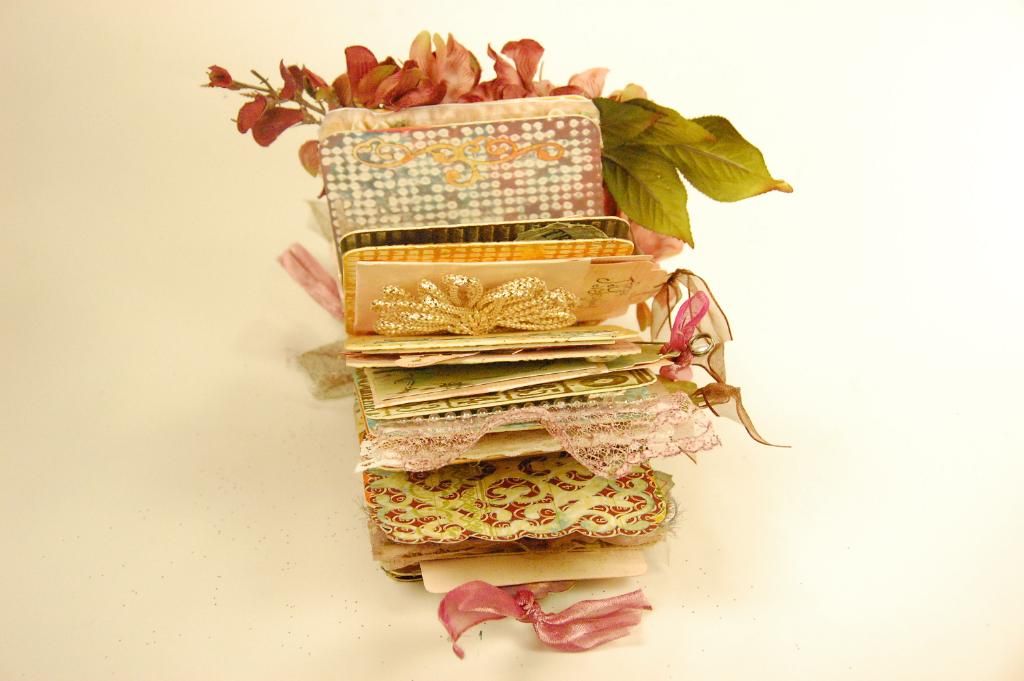
This is a view looking down.
I hope this mini is inspirational! I loved making it to share with all of you. I so appreciate your comments and following/subscribing here at Monique Griffith Designs and on my personal blog at 217 Creations. If you'd like to download this free Gypsy file, please visit this link: Time Mini Album
Thanks again and have a fab weekend!

Thanks again and have a fab weekend!

Hello,
ReplyDeletethank you for showing this nice album, it is great!
Greets Sabina
OMGoodness!!!! This is absolutely gorgeous!!!! I love all of it! Great job! TFS!
ReplyDeleteCindy
snoflaks.blogspot.com
Wow that album is absolutely gorgeous! I have always been afraid to use ink but you make it look so easy!
ReplyDeleteElizabeth, your mini album is incredible! So Victorian, and so detailed! I love it!
ReplyDeleteIt is beautiful tfs
ReplyDeleteBeautiful album! Thanks for sharing
ReplyDeleteYour mini album is beautiful! Using coasters was a great idea. TFS!
ReplyDeletetcsobotka at charter dot net
Beautiful mini Elizabeth! I love all of the different ink colors and the fact that you have all of the colors is crazy! Thanks for sharing this beautiful project!
ReplyDeletetoojoyous@bellsouth.net
What a gorgeous album! What a talented lady you are!
ReplyDeleteKaty
absolutely gorgeous.. it looks very complex from the picture in the beginning but with your directions I think I can do it! Thank you!
ReplyDeleteFabulous Mini! Love everything about it, TFS
ReplyDeleteThis is a gorgeous little book! Love it!
ReplyDeleteWhat a gorgeous album. I just love it!
ReplyDeleteI have so many coasters to use up, you've inspired me. Thanks for the video. papermemories4u @ yahoo .com
ReplyDeleteWow! This is gorgeous!!
ReplyDeleteWow, Wow, Wow is all I can say. Beautiful job and thanks for sharing. I always love learning new techniques and getting new reasons to buy more ink and folders.
ReplyDeletewtate11@sbcglobal.net
So Elizabeth, so amazing. I think this is absolutely stunning. You have such a flair. Thank you for the wonderful pictures and guidance.
ReplyDeleteHugs,
this is absolutely hands down the most ambitious album i have ever seen!!!!it is so beautiful!!
ReplyDeleteAll I can say is WOW. I don't think I would have the patience or smarts to come up with that. It is just beautiful
ReplyDeletePaula
quiltofhope at aol dot com
Wow, Elizabeth went all out! I am in awe!!
ReplyDeletekristyscraps@sbcglobal.net
Wow! This is incredible! What talent!
ReplyDeleteWendy T.
Beautiful album! Lots of time, work and detail, but a great result in the end... i will have to try the embossing and using distressing inks, you made it look so easy :)
ReplyDeleteWOW! This tiny book is so beautiful, so many wonderful details. I love it, I don't know if I could do it.
ReplyDeleteLove all the texture you gave the pages of this album with embossing and ink.
ReplyDeletesuch details, love the colors. Great inspirations
ReplyDeleteupnurse at aol dot com
All I can say is, "WOW!"
ReplyDeletekperlic at hotmail dot com
This is such a stunning album! It's funny that it all started out with bar-like coasters!
ReplyDeleteAbsolutely GOURGEOUS Elizabeth, this is simply stunning! TFS
ReplyDelete((Hugs)) Theresa
Thanks for sharing this fantastic album I have not brought Distress Ink, but now I will and try my hand at this creative design.
ReplyDeleteWhat a great album! I like your use of ink and embossing!
ReplyDeleteBEAUTIFUL! A lot of hard work went into this awesome project! Great job.
ReplyDeletemeggiemeg at comcast dot net
One absolutely gorgeous mini album. so many wonderful techniques and elements. TFS!
ReplyDeleteOh Wow!!! That is awesome! Thanks for the tutorial
ReplyDeleteA-Mazing! I love it! Off to check out your blog!
ReplyDeleteOMG-This is so amazing....Love it Proud you are showing your talent to our viewers
ReplyDeleteThis album is amazing! Love all the embossing - I'm impressed by your ink collection! ;)
ReplyDeleteThis is simply gorgeous. I love the technique you used. Beautiful.
ReplyDeleteSTUNNING!!! Liz never ceases to amaze me.
ReplyDeleteExquisite album to say the least! Thanks for the detail instructions.
ReplyDeleteYour album is beautiful! I love all the embossing, details, flowers, all of it! How fun that must have been to make...TFS!
ReplyDeleteCarol aka cyimbugbitten
bugbitten at hotmail dot com
beautifully done!!! luv the no matchy-matchy b/c each page can stand on it own and still blend with the rest of the pages.....
ReplyDeleteI absolutely love this album! I love making them too, but I've not taken mine over the top as you have - this is BEAUTIFUL!!! Thank you so much for sharing!
ReplyDeleteBlessings, Donna
grandma4five
Wow- very impressive!
ReplyDeleteAngee
gavinlover_99@yahoo.com
OMG this is just absolutely gorgeous! It makes a beautiful album and is a great way to make a sample book of inks and embossing folders. Thanx so much for the inspiration and sharing this adorable album. Of to order more lil coasters
ReplyDeleteKimMJ
bast830@comcast.net
This is amazing. I have to run but I can't wait to watch the video. Who would have thought those coaster could turn into something so cool.
ReplyDeleteNow that's a project! It is so beautiful. Great job.
ReplyDeleteThanks for sharing your album and techniques. It is super cute!
ReplyDeleteThanks for sharing your album. Love your techniques this the distress ink.
ReplyDeleteNow that's imagination!
ReplyDeleteJust beautiful! Thanks for sharing your talent.
ReplyDeleteValerie
vharrison 902 at gmail dot com
Such a gorgeous piece of art!!! I thought just the pretty colors on the embossed coasters was enough, but wow, you overdid it!
ReplyDeleteWOW!!!!!!!!! TFS this amazing piece of art and your creativity.
ReplyDeleteThe album is definitely a work of art. It takes my breath away. Simply stunning.....
ReplyDeletevery, very nice! looks like lots and lots of work. results are just beautiful.
ReplyDeleteGorgeous!!!! Makes me want to go get some more embossing folders!
ReplyDeleteHey this is a great album. TFS
ReplyDeleteLuria
So, so pretty!
ReplyDeleteVery cute! I love inking things up and think your coasters turned out great!!!
ReplyDeleteI do not even understand how I stopped up here, but
ReplyDeleteI assumed this publish used to be good. I don't understand who you're
but certainly you're going to a well-known blogger for those who aren't
already. Cheers!
Also visit my web-site ... s2000 parts
Magnificent goods from you, man. I've understand your stuff previous to and you're just extremely wonderful.
ReplyDeleteI really like what you have acquired here, certainly like
what you're saying and the way in which you say it. You make it enjoyable and you still take care of to keep it wise. I can not wait to read far more from you. This is really a tremendous web site.
Feel free to visit my website - mlb 13 the show