My BFF - The Bling Queen!

Pink Stamper

Support Team Monique!

Oh My Crafts

Stamps Alive

Hallmark Scrapbook

Everyday Cricut

Obsessed with Scrapbooking

Expressions Vinyl

Lezlye's Ink & Paper

Official Cricut Blog

Friday, June 17, 2011
Happy Friday! shelly here today . WOW i was so honored when wendy approached me about being guest designer for this month. i havent had the pleasure of meeting her or monique who i hear are just the sweetest but we live about 2 hours away so a visit is in the future.
thank you so much monique and wendy for thinking my crafty abilities are worthy.
for my project i made a card which is what i normally post on my blog. i do layouts too i just rarely share them.
i didnt make this card for any one specific person.. i made it for us all.. a reminder to NEVER lose yourself in someone or something so much that you lose yourself.
so now for the card..


for this i used walk in my garden (caterpillar) doodle charms (jar adding foam stickies behind for depth) and zoobaloo (branches and leaves. i bent one of the branches slightly and only adhered the top and bottom portions again for depth . pic 3 shows this)
wimg and d/charms were the first image carts i purchased, they are still my go to favorites.
i added stamped butterfly images, stickles, liquid pearls ,martha stewart border punch and colorbox fluid chalk.
thank you so much for your comments and thank you again monique and wendy for making me feel special :) have a great day and a fun weekend! happy crafting :) shelly
Friday, June 3, 2011

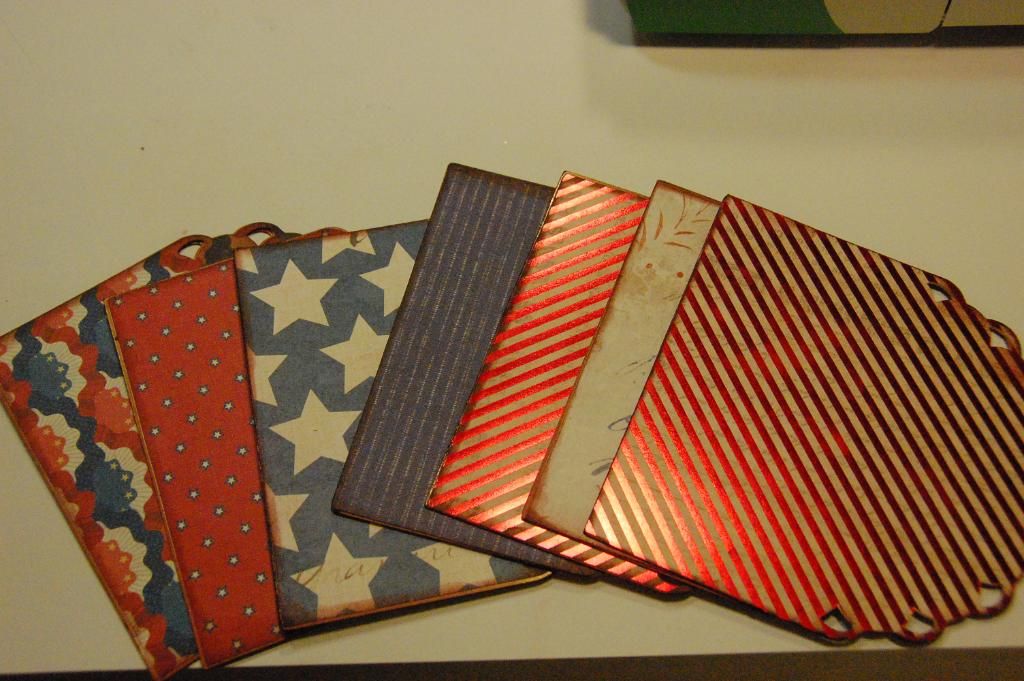
The base of the album is made using Elegant Edges. I cut the pages at 5.24 inches (Real Size Off). The paper is from K & Co Americana collection. This collection is awesome. I found it at Joann's. It is double sided and so full of yummy patterns! Once I attached all my papers to the album pages, I inked the edges with Chestnut Color Box ink. This particular shade of brown has a bit of a rust tone with really compliments the paper.

Next I bound the album with my Cinch.
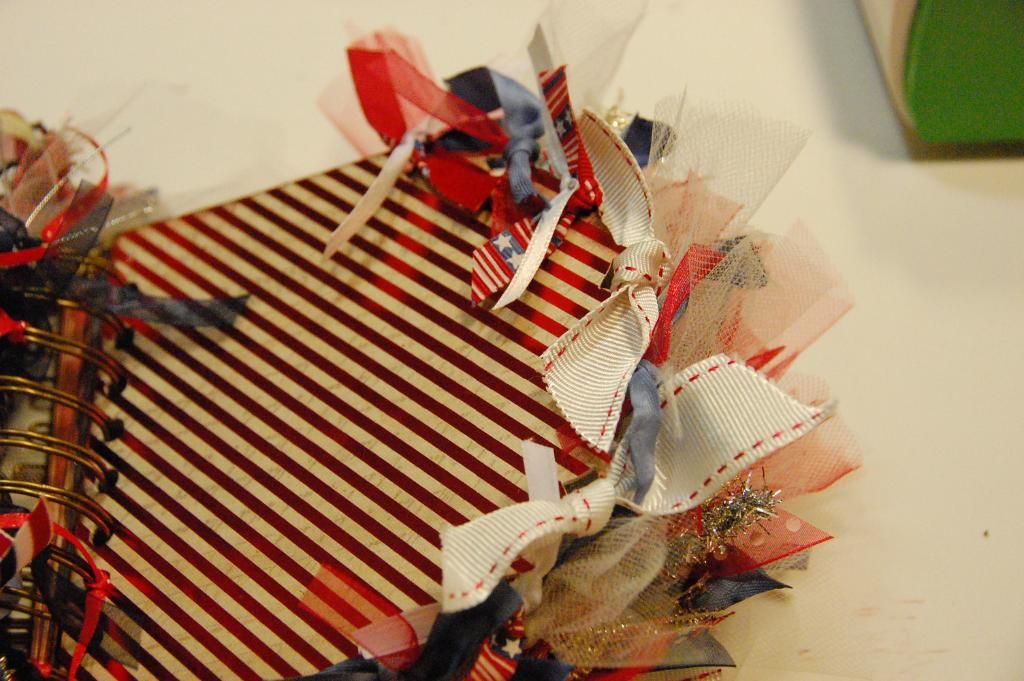
Then I began tying ribbons from my stash along the sides and the edges.

I kept tying until I felt like the album was full.

usually on my minis I like to have pockets and tags. But this one I did a bit different. I made a few of these straps out of thick ribbon to tuck pics and stuff into. I wrapped the ribbon tight and sealed to itself with ATG tape.

I then tied a flat bow and hid the seam. The ribbon is not attached to album. it is loose and can be lifted on both sides. I really love how this turned out!

Next I began cutting with nippers the back of these brads off. by cutting the back portion off, the brad will lay flat on my album. I used these on several pages and on the cover.

On the cover I used Pink By Design Stamps in Red, White and Blue to stamp the sentiments. I started with a red trimmed white grosgrain ribbon.

Using Archival Ink, I stamped the three sentiments to create a border. Stamping on fabric and ribbon is super easy and a great way to incorporate stamps into your project.

Since the ink dries pretty quick on fabric, I could add it to my cover using Terrifically Tacky Tape. Another feature on the cover I want to point out is the red metal spindle. I found this in a garage sale for a stamping store here in Kansas City. I always look for hardware items to add a bit of interest to my projects. To hide the hole in the spindle, I added a rhinestone. The font on the front is actually a phrase from Cricut Stand and Salute. The shadow layer and the sentiment are cut at 1.15 inches (Real Size Off). I also added some red white and blue pom poms. I found these at Joann's.
So do you want to see this inside pages?!?! I have both photos and video to share today.
I have a video of the this mini in action here:
If you are reading this on the blog, there is not need to click this link. It is for the readers who subscribe through Feedburner since Feedburner does not always add videos.

Here are the inside pages. I have made some notations about some pages and features. The bottecap on the left is from my stash.


The photo mats are all cut at 3.5 for base and 3.25 for top layer. On the right, I used some manila paper and stamped with Pink by Design Let's Write Backgrounder.


The stitching on these two mats are done with Paper Pizzaz Easy Stitcher. I used a White Signo Pen to the stitching. The Easy Stitcher is a a stencil that allows you to draw really straight stitching. I only wish I could draw that straight!

I love minis that become a part of my home decor. This one is no exception. It stand beautifully and can display all photos of my kiddos enjoying the holiday.

I want to thank you so much for looking through my album. This mini was so much fun to make. Now if you want the free Gypsy File, please visit my personal blog at 217 Creations.
I always appreciate the time it takes to leave a comment and to follow or subscribe both here at Monique Griffith Designs and on my blog 217 Creations. Have a great day!

Subscribe to:
Posts (Atom)
About Me
- Monique Griffith
- Rocklin, CA, United States
- The Monique Griffith Design Team consists of 4 Cricut Designers: Monique, Wendy Lawrence, Susan Rees and Becca Rees. We specialize in making Cricut Project Kits that you can make on your own with your Cricut, learning more about your bug in the process. You just need your Cricut Expression, the required cartridge(s), and a few basic tools. The directions come with a Cricut Cut Chart that shows you line by line exactly what you'll need to cut on your machine, with all of the settings for each cut. There are also well-organized written instructions and color photographs. We pride ourselves on our detailed designs, and on teaching others how to most effectively design with the Cricut. Currently, we have have downloadable directions on sale for only $5, and there are over 50 projects to choose from.
Counter

Grab my Button!
