My BFF - The Bling Queen!

Pink Stamper

Support Team Monique!

Oh My Crafts

Stamps Alive

Hallmark Scrapbook

Everyday Cricut

Obsessed with Scrapbooking

Expressions Vinyl

Lezlye's Ink & Paper

Official Cricut Blog

Monday, February 28, 2011
If you're popping over from Everyday Cricut, thanks for stopping by again! It's a wild and crazy week here on my blog, so you picked a great time to join us! Here is the altered picture frame designed by Bling Queen Wendy. If you haven't already, be sure to visit Everyday Cricut for instructions on how to make this. There's also great blog candy on all 3 of our blogs! Also, see below for today's NEW blog candy during our Week of Giveaways to celebrate hitting 2000 followers - and now almost 2100. Wow!! We're also releasing another new kit today, and it's gorgeous, so read on...

Today's blog candy is the Enchanted set by Imaginisce. There is a TON of stuff with this!! 6 sheets of double-sided patterned papers, a 6x6 paper pad, 6 acrylic stamps, ribbon, and bunches of embellishments. Isn't it SO cute??? To enter to win this, just follow this blog and then leave a comment on today's post. It's also helpful if you leave an email address so I can contact you if you win.

And finally, I'd like to introduce you to our newest kit, "Beautiful", which was designed by the Bling Queen herself, Wendy Lawrence. Wendy and I are both big fans of Tim Holtz, and this layout was inspired by the idea of "Tim meets Cricut". Who could ask for more? Just check out all of the hardware, details, textures and new techniques. Working through this kit will take your learning and creativity to new levels. To order, email me at moniquegriffith@yahoo.com. Include your state and preferred payment method (PayPal or check). See below for details.

Included with this kit, you will receive: all of the patterned papers, cardstock, ribbon, and all of the Tim Holtz hardware (hardware may vary slightly from kit to kit) and grungeboard needed to make the layout. You'll also get our detailed yet easy to follow directions with Cricut Chart, well-organized written instructions and plenty of color photographs.

To complete this project as shown, you will need the following supplies: Cricut Expression and mat, Home Decor cartridge, Ranger Distressing Inks-Dusty Concord & Walnut Stain (or any purple and brown chalk ink), Cuttlebug with Swiss Dots embossing folder (optional), Collage & Notebook set embossing folder from Ranger (or any other embossing folders of your choice), paper piercing tool, 3D pop dots, Mallet to pinch photo corners, glossy accents or paper glaze (to attach clear fragments to top of stamp), plus basic tools and adhesive.

This complete kit is $30, or you can purchase just the directions for $10. Shipping is available and ranges from $5 in California to $6-$9 in the rest of the US, depending on location. We're also happy to combine shipping, and we charge no more than $10 shipping even if ordering multiple kits. We're releasing a new kit everyday this week, so we are happy to keep adding to your order as you get more and more tempted as the week goes on!

This "Beautiful" kit will be ready for shipping on March 28th. Or if you're local to the Northern California area, you are welcome to pick-up in person.

To order, email me at moniquegriffith@yahoo.com. Include your state so I can calculate postage, and also your preferred payment method (PayPal or check).


Thanks for stopping by today, and I hope you enjoyed the projects. Didn't Wendy do an amazing job? Be sure to check in again tomorrow. On Everyday Cricut, I will have a his & hers card project. Also a video with some design tips on how to take your project to the next level. And there will be a new kit to show you here, plus brand new blog candy that I think you'll go "Buggy" about. Hmmmmm.
Happy Monday! Welcome to a hugely exciting week! If you're here from Everyday Cricut, thanks for stopping by. There's a whole lot going on around here, so buckle your seatbelts and hold on tight!

 Second, this is our Week of Giveaways!!! This blog just hit 2000 followers - how's that for great timing? So each and every day I'll be giving away blog candy. Let's start it off with a cartridge. Who would like to win Birthday Bash??? Just sign up to follow this blog and then leave a comment on today's post. It's helpful if you leave your email too, so I can reach you if you win.
Sooooo, speaking of the Birthday Bash cartridge, here's our newest kit, "Party On", which uses this fabulous new cart. This was designed by Nana Susan. To order, just email me at moniquegriffith@yahoo.com. See details below.

This detailed and fun-filled layout is perfect for pictures of your favorite birthday boy or girl of any age! With this kit, you'll receive all of the patterned papers, cardstock and ribbon that you'll need to complete the layout. And of course you'll get full directions as well.

To complete this layout as shown, you will need the following supplies: Cricut Expression and mat, Birthday Bash cartridge, dark brown chalk ink, white gel pen, Diamond Stickles, mini glue dots, plus basic tools and adhesive.

This "Party On" kit is $25 for the full kit - or you can always order just the detailed directions to this or any of our kits for $10. This kit, and most of the kits we'll show you this week, will be ready for shipping on March 28th. Shipping ranges from $5 in California to $6-$9 in the rest of the US, depending on location. We're happy to combine shipping, so even if you're ordering several kits, you won't pay more than $10 shipping in the US.

To order, just email me at moniquegriffith@yahoo.com. Let me know which kit(s) you'd like, plus your state or zip code, and preferred payment method (PayPal or check).

Don't forget to leave a comment for the blog candy. And be sure to stop by each day this week for more projects, giveaways and kits!!
First of all, here is the layout that I'm showcasing on Everyday Cricut today. If you don't already know, Wendy and I are taking over Everyday Cricut forever and ever. Ok, ok - maybe it's just this week while Joy and Melanie are on the Cricut Cruise. Please visit Everyday Cricut for sizing details and some tips on how to make this yourself. Hope you like it - I had a blast making it!


Also, this week, the Design Team and I will be releasing a new kit each day. If you are not familiar with our kits, here's the scoop. We design Cricut project kits that include all of the paper, ribbon, brads, etc. You'll also get our detailed yet easy to follow directions, including a Cricut Cut Chart which shows you line by line exactly what you need to cut on your machine with all cuts grouped by color to make it efficient, plus well-organized written instructions and plenty of color photographs. Also, things like border strips and photo mats are pre-cut for you. We have been doing this for 2 years and have hundreds of happy clients. Most kits require you to have an Expression, a certain cartridge, and a few basic tools.
Sooooo, speaking of the Birthday Bash cartridge, here's our newest kit, "Party On", which uses this fabulous new cart. This was designed by Nana Susan. To order, just email me at moniquegriffith@yahoo.com. See details below.

This detailed and fun-filled layout is perfect for pictures of your favorite birthday boy or girl of any age! With this kit, you'll receive all of the patterned papers, cardstock and ribbon that you'll need to complete the layout. And of course you'll get full directions as well.

To complete this layout as shown, you will need the following supplies: Cricut Expression and mat, Birthday Bash cartridge, dark brown chalk ink, white gel pen, Diamond Stickles, mini glue dots, plus basic tools and adhesive.

This "Party On" kit is $25 for the full kit - or you can always order just the detailed directions to this or any of our kits for $10. This kit, and most of the kits we'll show you this week, will be ready for shipping on March 28th. Shipping ranges from $5 in California to $6-$9 in the rest of the US, depending on location. We're happy to combine shipping, so even if you're ordering several kits, you won't pay more than $10 shipping in the US.

To order, just email me at moniquegriffith@yahoo.com. Let me know which kit(s) you'd like, plus your state or zip code, and preferred payment method (PayPal or check).

Don't forget to leave a comment for the blog candy. And be sure to stop by each day this week for more projects, giveaways and kits!!
Sunday, February 27, 2011

1. A brand new project each day with sizing info and tips on how to make it yourself. Plus at least 1-2 corresponding videos as well.
2. We're also releasing a different brand new KIT each day.
3. AND we're doing our Week of Giveaways on this blog. I was going to do it when we hit 2000 followers, but look how close we are - so let's do it! That means a different giveaway EACH day, and it'll start with a cartridge on Monday!
4. Plus of course there is blog candy on Everyday Cricut too.
Who's ready to PARTY with us???
And we've got a winner for this week's blog candy. This winner will get to choose a theme, and I will make a custom layout just for her. Don't worry - I'll be sure to share it on the blog too so everyone else can check it out and wish they had won, hehe. The winner is...
Kathleen said...Well, "Wow" is all I can think of to say about this. Love the look of the metal and the 3D look of it.
TFS, Monique and Amaco is so very lucky to have you as a designer.
Kathleen in NJ
Congrats, Kathleen! I'm looking forward to working on a layout just for you!!
Thursday, February 24, 2011
Yee-HAW!!! I'm going to the Texas Cricut Stampede!!! It's kind of a last-minute decision as the event is in 3 weeks, but I'm super excited! Actually, I'm going to help out with the event, and Nana Susan is coming with me - we just booked our flight today. We will both be Creative Critterz staff members for the weekend, and will help out with make-n-takes, etc. We will also be bringing kits with us that will be for sale. In fact, I'm planning a special layout kit specifically for this event, and can't wait to show it to you!

The Cricut Stampede is in Frisco, Texas from March 18th-20th. I believe there are still a few spots available, so you can find more info HERE. Last I heard, there are 182 people registered, and they are flying in from all over the place. It's going to be incredible, and I'm sooooo looking forward to meeting so many cool people! So make sure you tell me if you're going to be there!
Btw, NEXT WEEK is going to be a very exciting week around here, so do NOT miss it!!! I will tell you more on Sunday - promise! And be sure to leave a comment today for a chance to win a custom-designed layout with the theme of your choice. I'll be drawing the winner for that this weekend. Who's it gonna be????
Happy Thursday!! Today I want to share with you a 1 page layout that I designed for Amaco. They hired me to make this for their CHA booth display. I used 2 different colors of their Art Emboss metal - the "Light Copper" and "Light Brass". This metal is thin and wonderful for embossing. Different colors actually have different thicknesses, though. On a previous project, I used the red metal, and it was softer and thinner than these 2 colors.
 These 2 colors shown here are too thick to run through the Cricut, so I decided to try cutting them in the Cuttlebug with a die. I have a butterfly die with several coordinating embossing folders, so I thought it would work perfectly. However, I must say that this metal was just a hair too thick for cutting in the Cuttlebug. It cut most of the way through, but I had to trim around it with scissors to really make it work. Still worth it, though, for such a unique look.
 After I cut the butterflies, I then ran each of them through the Cuttlebug with an embossing folder. I then bent up the wings, and used mini glue dots to attach the bodies to the page. Since I already knew that I wanted to incorporate these 2 metal colors, which are kind of an orange tone and yellow tone, I purposely looked for papers that also included orange and yellow to help coordinate the whole color scheme. These particular papers are from Pink Paislee, and I also love that I was able to bring out some blue, both light and dark. Having the dark blue in there really added some contrast to help make it "pop". There's that word!! Yes, contrast is my friend.
 Oh, you want more details, do ya? Ok, the background of course is 12x12. The scallop square is cut from Storybook at 11". Dark blue square is 9 1/2 x 9 1/2. Striped square is 9x9. Oh, and pretty much everything is inked with dark brown. Light copper photo mat is 4 3/4 x 6 3/4, and was embossed with the Tapestry embossing folder. Light blue photo mat is 4 1/4 x 6 1/4. Dark blue photo corners are from a Stampin' Up punch. Little girl is cut from A Child's Year at 4 1/2", and is on a dark blue shadow of the same size. I added 3 brass brads to every corner of the striped square to help bring that color and metal look throughout the layout a little more. The title and journal box were just part of the paper pack from Pink Paislee. Whew!
Don't forget to leave a comment to be entered to win this week's blog candy. I will choose a random winner, and the winner will get to choose a theme and then I will custom make a completed layout just for that person. It's gonna be fun! Also, I want to thank you for your input regarding what you'd like to learn about. That was very helpful for me, and I hope to put that to good use in the future. :)


Don't forget to leave a comment to be entered to win this week's blog candy. I will choose a random winner, and the winner will get to choose a theme and then I will custom make a completed layout just for that person. It's gonna be fun! Also, I want to thank you for your input regarding what you'd like to learn about. That was very helpful for me, and I hope to put that to good use in the future. :)
Wednesday, February 23, 2011
As promised, here are a few more layouts from my Disney Cruise album. See below. But first...
Here's a question for the day, and I would LOVE to hear your feedback. What would you most love to learn about? Some possible answers...
a. Step by step directions on how to make Cricut projects (layouts or cards?)
b. Principles of designing - such as mixing patterns, making things "pop", etc.
c. How to use the Expression machine itself - such as the Mode buttons, etc.
d. Gypsy tips and tricks
e. Other machines - Cake, Imagine, Yudu
f. New stuff coming out - Cricut Craft Room software, Anniversary "E2" Expression
g. Product reviews
h. Other - I'd love to hear your ideas!
Poolside layout using Mickey & Friends and the Mickey Font. Gotta love Pluto! This paper was from Stampin' Up. I also used the Stampin' Up corner punch to get the snazzy layered photo corners.

Showtime layout in classic Disney colors. I believe the large silhouette Mickey head is from Mickey & Friends. And of course the lettering is Mickey Font.

This one is almost too simple. I want to go back and add more stuff to it! But when I made it, I was trying to keep the focus on the pictures, because the scenery was so gorgeous. The font I used was Cuttin' Up - a real favorite of mine. I think the surfboard, wave journal box and little dolphin were from Ocean of Words.

Layout of our dolphin swim excursion. The pics were taken with a waterproof disposable camera, so the quality was not fantastic. I kept the color palate clean to go with the photos. Font is Cuttin' Up, and dolphins are from Ocean of Words.

Thanks for checking in. Don't forget to leave a comment today. I'd love to hear your input on the question for today. And that will enter you into the drawing for this week's blog candy. The winner will get to choose a theme, and I will make a completed layout with that theme just for them.
Monday, February 21, 2011
Any Disney fans out there? For today (and maybe tomorrow too), I thought I'd share a few layouts I did of our family's Disney Cruise a couple of years ago. These are pretty simple layouts using Mickey & Friends, Mickey Font, and the princess carts. The paper is from a pack that I bought on the ship. These are not what I'd call my "best" work, but this is pretty much how I scrap when I'm actually trying to get something done, LOL! And you'll probably notice that I'm terrible about journaling, so do not follow my example on that - I'm bad!!
Don't forget to leave a comment on today's post for a chance to win this week's blog candy. I will pick a random winner, and that person will get to choose a theme for a layout that I will custom make just for them. It'll be a completed layout - not a kit, so you can pick from any cart I own (about 120) for the theme. You could even pick a layout like the "Gone Buggy" one I posted on Friday with the new Cricut Everyday cartridge. Totally your choice, and I'm super excited about doing this - it's going to be SOOOO much fun for me - and hopefully for you too!
 Easy layout with Mickey and Goofy from the Mickey & Friends cart. Even the journal tag is from that cart.
 Close-up of the Goof himself. I tied twine through the buttons to add more texture and somewhat of a nautical look.
 Sail Away Baby was cut with the Mickey Font. That's the only Cricut work on this layout. Yes, I'm a big ol' cheater using those pre-printed border strips.
 The Mickey head was cut with Mickey & Friends, and the "Room with a View" is the Mickey Font. I turned this into a little pocket to hold our room keys. "Animator's Palate" was actually welded in Design Studio, and then cut out in yellow and black, off-setting the bottom layer so it looks like a shadow.
 Cinderella is from the Happily Ever After cartridge, and Belle is from Dreams Come True. Pretty sure the title is from Dreams Come True as well, hehe.
 Close-up of Cinderella. The princesses are not the easiest things to cut and assemble, but if you do them fairly large, they're not too bad. These were each cut at about 5 1/2" I believe. The eyes are the trickiest part, and I used a white Signo Uniball gel pen to help with that.
 Here's Belle. I added Diamond Stickles to the dresses of both princesses for extra pizzazz.
Thanks for stopping by. I'll have more Disney Cruise layouts tomorrow. And btw, we've got something exciting going on NEXT week, so stay tuned for more details later. It's gonna be FUN!!!
Don't forget to leave a comment on today's post for a chance to win this week's blog candy. I will pick a random winner, and that person will get to choose a theme for a layout that I will custom make just for them. It'll be a completed layout - not a kit, so you can pick from any cart I own (about 120) for the theme. You could even pick a layout like the "Gone Buggy" one I posted on Friday with the new Cricut Everyday cartridge. Totally your choice, and I'm super excited about doing this - it's going to be SOOOO much fun for me - and hopefully for you too!


Thanks for stopping by. I'll have more Disney Cruise layouts tomorrow. And btw, we've got something exciting going on NEXT week, so stay tuned for more details later. It's gonna be FUN!!!
Tea Time! Check out this adorable layout by Nana Susan. She used the Once Upon a Princess cartridge, papers from My Mind's Eye, ribbon from Stampin' Up, and hand-crocheted flowers. And yes, that's my little angel sipping tea with her friends.
I have a potentially fun idea for this week's blog candy, but you've gotta let me know what you think of the idea. Ready? How about if I make a custom layout with a theme of your choice, and the winner gets the completed layout? Do you like the idea? What theme would you choose? Examples would be: princess, baby, little girl, boy, wedding, birthday, outdoorsy, sports, animals, etc, etc. - the sky's the limit! I think this could be a blast and can't wait to read your ideas!


I have a potentially fun idea for this week's blog candy, but you've gotta let me know what you think of the idea. Ready? How about if I make a custom layout with a theme of your choice, and the winner gets the completed layout? Do you like the idea? What theme would you choose? Examples would be: princess, baby, little girl, boy, wedding, birthday, outdoorsy, sports, animals, etc, etc. - the sky's the limit! I think this could be a blast and can't wait to read your ideas!


Sunday, February 20, 2011
The winner of this week's blog candy is...
Donna said...
This is one of the cutest layouts I've seen in a very long time!
Blessings, Donna
grandma4five
Donna, you have won your choice of either the "In Bloom" kit or the "Spring into Action" kit. Either one will include all of the papers, ribbon, etc. + directions, and requires the A Child's Year cartridge to make it. Just email me at moniquegriffith@yahoo.com and let me know your choice and shipping address. Congrats!!


Friday, February 18, 2011
How about a little something fun today? Yesterday I got my brand new Cricut Circle cartridge, which is called "Cricut Everyday", so today I just had to take a few hours to play with it. Personally, I LOVE this cart!!! Not only does it have the bug head on it, but all of the different logos, the different machines, and TONS of really cute scrapbook sayings. (Not to mention some 3D cuts and various favor type objects you could use to decorate for a crop.) It was hard to choose a favorite! I just made a quick little layout that I can use to scrap pics of our recent Swarm. I have the Pink Expression, so of course I had to make a matchy-matchy one for the layout. Hope you like it!!! (Don't forget - leave a comment on this post for a chance to win this week's blog candy - the "In Bloom" or "Spring into Action" kit.)

The papers I used are from My Mind's Eye, Bo Bunny and Stampin' Up. Ribbon is Stampin' Up.

The Cuttlebug was cut at 3" with all of the layers. I inked the edges, added some white pen accents and pop-dotted it.

I cut the Expression machine at 3 1/2", and again inked the edges and added some white accents. BTW, it tries to cut out the little buttons for the machine, but they are super duper tiny, and there was no way I was going to mess with them, so I drew them in with a pink pen.

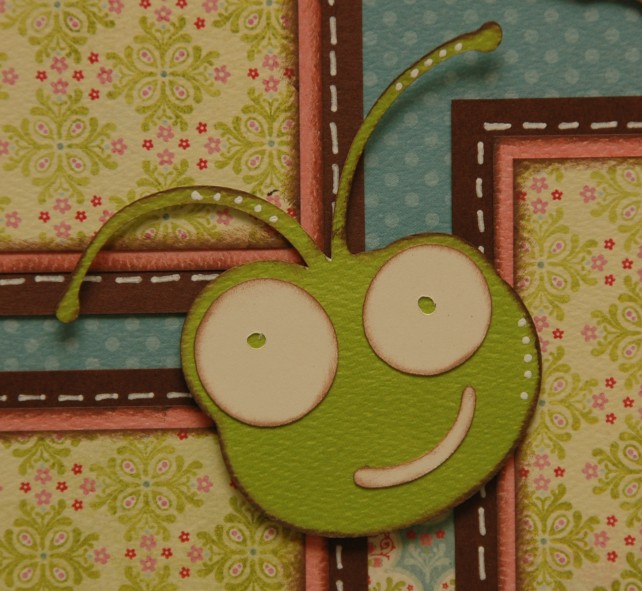
This bug head was cut at 4", but its actual size turned out smaller than that. How cute is he? She???

And I cut this larger bug head at 6 1/2" using Flip. The "Gone Buggy" title was cut at 5", and layered with its shadow.

Thanks for stopping by. Enjoy your Friday!!

The papers I used are from My Mind's Eye, Bo Bunny and Stampin' Up. Ribbon is Stampin' Up.

The Cuttlebug was cut at 3" with all of the layers. I inked the edges, added some white pen accents and pop-dotted it.

I cut the Expression machine at 3 1/2", and again inked the edges and added some white accents. BTW, it tries to cut out the little buttons for the machine, but they are super duper tiny, and there was no way I was going to mess with them, so I drew them in with a pink pen.

This bug head was cut at 4", but its actual size turned out smaller than that. How cute is he? She???
And I cut this larger bug head at 6 1/2" using Flip. The "Gone Buggy" title was cut at 5", and layered with its shadow.

Thanks for stopping by. Enjoy your Friday!!
Tuesday, February 15, 2011
Howdy, pardner! Who has the Old West cartridge? Have you used it yet? It's so goat-ropin' cute! This is a layout that was a team effort between myself and Nana Susan. I worked on the background and some of the photo mats, and then Nana Susan worked on the Cricut stuff, added all the cute details and completed the layout. The pictures were from my Emily's 4th birthday party. Ahhh, being an only child has its advantages.


Don't forget to leave a comment to be entered for this week's blog candy - your choice of the "In Bloom" or "Spring into Action" kit.
Also, I just noticed that we're at 1950 followers. Wow!!! So just an FYI, I'm going to do another "Week of Giveaways" when we hit 2000 - just like I did when it hit 1000, and I'll give away something different each day for a week. Should be fun!


Subscribe to:
Posts (Atom)
About Me
- Monique Griffith
- Rocklin, CA, United States
- The Monique Griffith Design Team consists of 4 Cricut Designers: Monique, Wendy Lawrence, Susan Rees and Becca Rees. We specialize in making Cricut Project Kits that you can make on your own with your Cricut, learning more about your bug in the process. You just need your Cricut Expression, the required cartridge(s), and a few basic tools. The directions come with a Cricut Cut Chart that shows you line by line exactly what you'll need to cut on your machine, with all of the settings for each cut. There are also well-organized written instructions and color photographs. We pride ourselves on our detailed designs, and on teaching others how to most effectively design with the Cricut. Currently, we have have downloadable directions on sale for only $5, and there are over 50 projects to choose from.
Counter

Grab my Button!
