
My BFF - The Bling Queen!

Pink Stamper

Support Team Monique!

Oh My Crafts

Stamps Alive

Hallmark Scrapbook

Everyday Cricut

Obsessed with Scrapbooking

Expressions Vinyl

Lezlye's Ink & Paper

Official Cricut Blog

Friday, April 5, 2013
Spring greetings, my Cricut friends! Well, I am in Florida at the moment, enjoying my extended family and the beautiful weather. And hey, I just so happened to have finished writing directions for a couple of my latest layouts. Yup, there are TWO brand new ones!
Speaking of Florida, who doesn't love a fun Disney layout? I know I could use about 20 more as I have so many pictures from various trips and even a couple of Disney themed birthday parties I've thrown. So I present to you my new "Disney Magic" layout... (See below for more details.)

And yes, I know that Spring has sprung (in most parts of the country anyway). So at least now you can feel your fingers enough to scrap all of those snow pictures you took this winter. And this new "Frosty" layout should get you started... (See below for more details.)

Full directions to both of these layouts (and a bunch more) are now available on my Cricut Kits page for $5 each. Directions include my Cricut Cut Chart, which shows you line by line exactly what you'll need to cut on your machine with all of the settings. And cuts are grouped by color so it's nice and efficient. There are also well organized written instructions and plenty of color photographs. Detailed paper information is also included. If you purchase directions with PayPal, you'll soon get an email through which you can automatically download the directions right away. Google checkout is also an option, but I do process those by hand, so it may take upto a day or two.

 To complete the Disney Magic layout as shown, you'll need the following supplies:


Speaking of Florida, who doesn't love a fun Disney layout? I know I could use about 20 more as I have so many pictures from various trips and even a couple of Disney themed birthday parties I've thrown. So I present to you my new "Disney Magic" layout... (See below for more details.)

And yes, I know that Spring has sprung (in most parts of the country anyway). So at least now you can feel your fingers enough to scrap all of those snow pictures you took this winter. And this new "Frosty" layout should get you started... (See below for more details.)

Full directions to both of these layouts (and a bunch more) are now available on my Cricut Kits page for $5 each. Directions include my Cricut Cut Chart, which shows you line by line exactly what you'll need to cut on your machine with all of the settings. And cuts are grouped by color so it's nice and efficient. There are also well organized written instructions and plenty of color photographs. Detailed paper information is also included. If you purchase directions with PayPal, you'll soon get an email through which you can automatically download the directions right away. Google checkout is also an option, but I do process those by hand, so it may take upto a day or two.
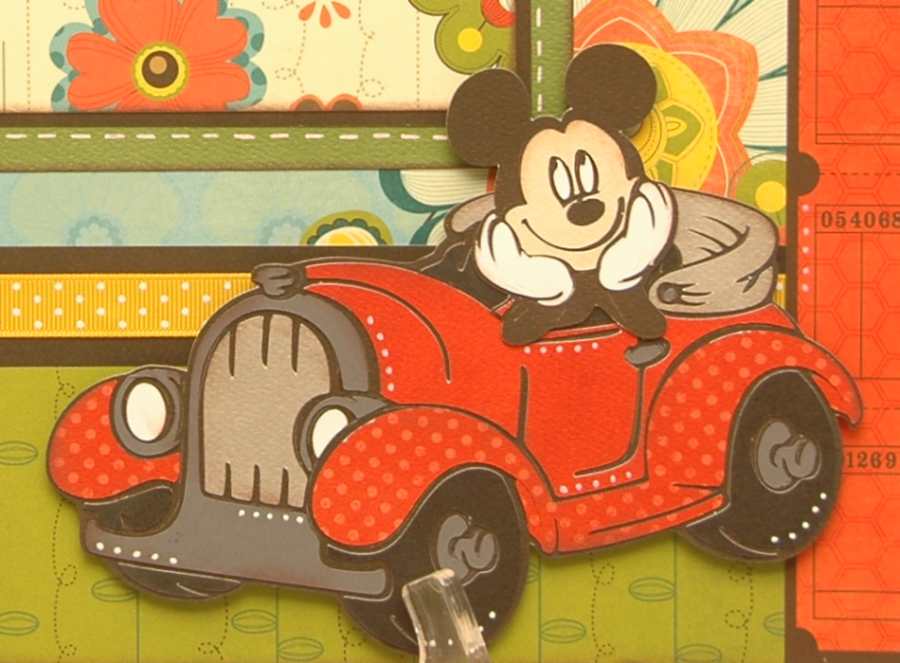

Cricut Expression®, Mickey & Friends cart, Mickey
Font cart, dark brown chalk ink, 3D pop dots, white gel pen, Scotch tape, plus basic
tools and adhesive. You’ll
also need ribbon (I used 1/2” width bright yellow with white polka dots
grosgrain ribbon, plus some natural colored twine rope) plus papers and cardstock.


To complete the Frosty layout as shown, you'll need the following supplies: Cricut Expression®, Winter Frolic cart, dark blue chalk
ink, 3D pop dots, white gel pen, brown pen, Diamond Stickles, scallop border
punch (optional), white buttons, light blue ribbon, mini glue dots, plus basic
tools and adhesive. You'll also need papers and cardstock.
By the way, if you're not subscribed to my blog already, you may want to do so if you'd like to get an email notification when I post something new (which isn't quite so often these days). This is different than "following" my blog, and you'll actually need to enter your email address in the "Get Email Alerts" box in the lower right column on my blog.
Thanks for stopping by, and I hope to be bringing your more layout directions again in the near future.
Subscribe to:
Posts (Atom)
About Me
- Monique Griffith
- Rocklin, CA, United States
- The Monique Griffith Design Team consists of 4 Cricut Designers: Monique, Wendy Lawrence, Susan Rees and Becca Rees. We specialize in making Cricut Project Kits that you can make on your own with your Cricut, learning more about your bug in the process. You just need your Cricut Expression, the required cartridge(s), and a few basic tools. The directions come with a Cricut Cut Chart that shows you line by line exactly what you'll need to cut on your machine, with all of the settings for each cut. There are also well-organized written instructions and color photographs. We pride ourselves on our detailed designs, and on teaching others how to most effectively design with the Cricut. Currently, we have have downloadable directions on sale for only $5, and there are over 50 projects to choose from.
Counter

Grab my Button!
