
My BFF - The Bling Queen!

Pink Stamper

Support Team Monique!

Oh My Crafts

Stamps Alive

Hallmark Scrapbook

Everyday Cricut

Obsessed with Scrapbooking

Expressions Vinyl

Lezlye's Ink & Paper

Official Cricut Blog


Hellooooo??? (((Helloooo?))) (((Helloooo?))) Is there anyone in here? Or is this an old, abandoned cave now? I hope there's no bears hibernating and waiting for an easy meal. I'll tip toe very quietly. Shhhhh.
I think the coast is clear. I'm going to write in hieroglyphics on the cave wall so that future generations will know I was here in 2020, the year the world almost ended. But before it almost ended, I made a really fun Snoopy layout in a last ditch attempt to bring joy to a downtrodden world.
If you are still alive out there, and if you still have electricity and working craft supplies, this one is for you. It's my first ever DIGITAL kit!! Yup, you'll get a zip file with a bunch of separate svg files and one pdf file with directions and color photos. Then you just cut everything with your own machine and put it together. I even designed it with solid color cardstock so it's easy to reproduce. It's only $7, and before you ask, nope, I'm not making any actual kits - not even for my own mother. So go buy the file for your Silhouette or Cricut (newish model that uses Design Studio software), and have one last hurrah before the end of the world. Link to Etsy file is HERE.


Here are just a few of the dollar direction deals...


As you know, October is Breast Cancer Awareness Month. I'm now a 5 year Survivor of Inflammatory Breast Cancer, which is seriously miraculous!! I'm happy, healthy, and enjoying life, and so very thankful for that! IBC is the most deadly form of breast cancer, and has only a 40% survival rate, yet many people don't even know about it. Please learn the signs here on the IBC Network Foundation site, and be aware!!
So, the other day, I went on a Google search, hunting for an image of Snoopy (my favorite!!) holding a pink ribbon. I could find nothing even close, so I got to work designing it myself. I made a shirt for myself, and one for Emily and my Mom. And then it occurred to me that maybe I could do some good with this design. So I ordered a bunch more blank t-shirts, and also made some decals, and I'll be donating $2 from each item sold to IBC research (though my friend Terry Arnold, who founded the IBC Network Foundation, and is a Survivor herself, as well as a fantastic advocate and speaker for us!). You can purchase the t-shirts and decals on my Etsy Store HERE. You'll get something cute, show your support, and be contributing to research all at the same time!!


In other news - on a more personal front, here's what I've been upto. For the past 2 years, I have been taking TaeKwonDo with Emily, who is now 11. We are both blue belts now, and have learned SO much! I love seeing Emily enjoy a sport and excel at it. And it's been a dream of mine for many years to earn my black belt. We should both be testing for black belt in exactly 1 year. So I'm really stepping up my fitness routine, and have added weight lifting, and will be really focusing on my running as well. I plan to be VERY ready!! I also enjoy being a stay-at-home-mom to Em, and helping her with homework and school stuff each night. For her recent birthday, I agreed to re-do her room from pastel little princess look to a bright turquoise ocean theme. I'm even painting an ocean mural on a 14 foot long wall in her room. It may take me a while longer to finish, but it's coming along nicely.

I sure hope you all are doing well. Be healthy and go get your mammograms!!!!!
On a personal note, I am doing well - still healthy and cancer free!! Woohoo!! I am still scrapbooking for personal fun, but have ventured into custom t-shirt production as a little side gig. In fact, I am now in the process of making over 400 shirts for my daughter's school. Whoa! So I will be pretty tied up for a while now.
Hugs to all of you. I always love hearing from you!!


Monique Griffith Etsy Store


Now, before you freak out and run away screaming, let me tell you that yes, this IS a very detailed layout. BUT there isn't anything truly difficult about it. It just has a lot going on. So as long as you're a little patient, and promise not to hate me, you can do this layout just fine and impress your friends at the crops you go to! And believe me, these will be the best $5 directions you'll ever get. Truly, this would be a nightmare to scraplift because everything is at weird sizes due to how strangely these 2 cartridges are designed. For instance, that big old house is actually cut at 2 3/4". So don't waste truckloads of paper and 8 hours of your time re-cutting things - I've already done it for you! These directions are very, very thorough, have detailed paper info, my usual Cricut Cut Chart, and somewhere around 25 color photos, including lots of close-ups and some step-by-step pics.

Ok, let's talk about paper for a moment, shall we? Paper is a very tricky thing for me as a designer, and for you as a consumer. Paper is like clothing - it comes and goes fairly quickly in and out of stores. It's usually easier to find it online, but even then it will sometimes be elusive, even if it hasn't been out for very long. This new Fall Friends layout uses paper from Doodlebug that is very new, so that should help those of you who like to copy my designs to the last detail.
However, if you ever purchase directions from a while back, and can't find the exact paper - it's ok!! Find something kind of similar either in theme or in color scheme, and do your best to substitute. And as far as the solid cardstock goes, I mostly use Bo Bunny's double dot cardstock because it cuts like butter, and they have fantastic colors. However, you don't need to use the same stuff I use. If you don't have Bo Bunny readily available, you can just gather your patterned papers and take them into any store that sells any brand of cardstock. Then just find a bunch of solids that coordinate. You can use my directions as your guide to make sure that you get a dark brown, medium brown, dark green, medium green, etc. and it will work just beautifully.

So now that we've had our little heart-to-heart discussion, here's the deal. You can get the full directions for $5 for this Fall Friends layout and a bazillion of our other projects on the Cricut Kits page. All directions include Cricut Cut Chart which shows you line by line exactly what to cut on your machine, well-organized written instructions and plenty of color photographs. If you purchase the directions using PayPal, you'll soon get an email with a link so you can automatically download the directions right away. I'm not sure if Google Checkout is still working, as it is being done away with at some point soon. But hey, nearly all of you seem to prefer PayPal, so that shouldn't be an issue.

To complete this project as shown, you'll need the following supplies:


Tropical Escape Layout - Requires Life's a Beach cartridge.

Beautiful U Layout - Requires Home Decor Cartridge.

Built to Play Layout - Requires Robotz Cartridge.

Christmas Morning Layout - Requires Joys of the Season Cartridge + any font.

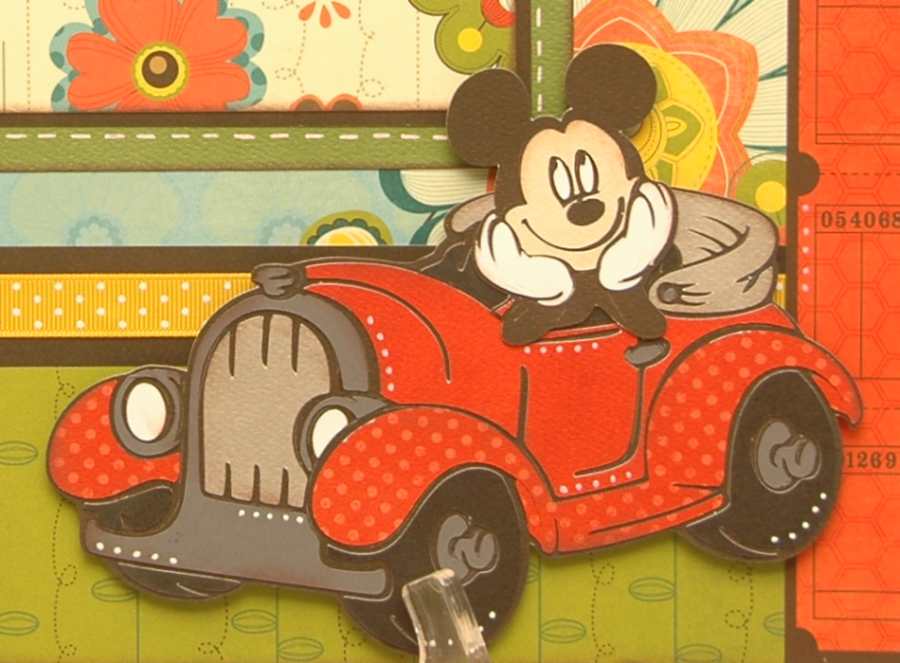
Cruisin' Layout - Requires Nifty Fifties Cartridge.

Fabulous & Feisty Layout - Requires Paisley Cartridge.

Princess Layout - Requires Once Upon a Princess Cartridge.

Spring Into Action Layout - Requires A Child's Year Cartridge.

Tuff Girl Layout - Requires Rock Princess Cartridge.

Ps. Be on the lookout for another post in the next day or two. I'll be posting my brand new Fall Friends layout, and I think it's safe to say that it's my most detailed design yet.

Full directions to this layout (and a zillion more) are available on my Cricut Kits page for $5 each. Directions include my Cricut Cut Chart, which shows you line by line exactly what you'll need to cut with your machine with all of the settings. And cuts are grouped by color so it's nice and efficient. There are also well-organized written instructions, exact mat dimensions, and plenty of color photographs. Plus detailed paper information is also included. If you purchase the directions using PayPal, you'll soon get an email with a link so you can automatically download the directions right away. I'm not sure if Google Checkout is still working, as it is being done away with at some point soon. But hey, nearly all of you seem to prefer PayPal, so we should be fine.

To complete this layout as shown, you'll need the following supplies: Cricut Expression and mat, Animal Kingdom cartridge, George cartridge (or any cart with a circle), dark brown chalk ink, 3D pop-dots, black pen, white or silver gel pen, thin rope or twine, Cuttlebug + Forest Branches (or your favorite) embossing folder, plus basic tools and adhesive. I also used black and brown 1/4" grosgrain ribbon.

Be sure to subscribe to this blog (in the right column under "Get E-mail Alerts") so you'll get email alerts when I post new layouts. I have a few fun ones coming up this fall!


Full directions to this layout (and a bunch more) are now available on my Cricut Kits page for $5 each. Directions include my Cricut Cut Chart, which shows you line by line exactly what you'll need to cut on your machine with all of the settings. And cuts are grouped by color so it's nice and efficient. There are also well organized written instructions and plenty of color photographs. Detailed paper information is also included. If you purchase directions with PayPal, you'll soon get an email through which you can automatically download the directions right away. Google checkout is also an option, but I do process those by hand, so it may take upto a day or two.


This is a very detailed layout, with a few oddities, but with some time and patience, you shouldn't have too much trouble (I hope!!) To complete this layout as shown, you'll need the following supplies: Cricut Expression®, Life’s a Beach cart, Mickey & Friends cart, dark brown chalk ink, 3D pop dots, white gel pen, black pen, piercing tool, plus basic tools and adhesive. I also used 3 medium silver brads (1/2” diameter) and some blue polka dot ribbon (3/8” wide).


Speaking of Florida, who doesn't love a fun Disney layout? I know I could use about 20 more as I have so many pictures from various trips and even a couple of Disney themed birthday parties I've thrown. So I present to you my new "Disney Magic" layout... (See below for more details.)

And yes, I know that Spring has sprung (in most parts of the country anyway). So at least now you can feel your fingers enough to scrap all of those snow pictures you took this winter. And this new "Frosty" layout should get you started... (See below for more details.)

Full directions to both of these layouts (and a bunch more) are now available on my Cricut Kits page for $5 each. Directions include my Cricut Cut Chart, which shows you line by line exactly what you'll need to cut on your machine with all of the settings. And cuts are grouped by color so it's nice and efficient. There are also well organized written instructions and plenty of color photographs. Detailed paper information is also included. If you purchase directions with PayPal, you'll soon get an email through which you can automatically download the directions right away. Google checkout is also an option, but I do process those by hand, so it may take upto a day or two.


About Me

- Monique Griffith
- Rocklin, CA, United States
- The Monique Griffith Design Team consists of 4 Cricut Designers: Monique, Wendy Lawrence, Susan Rees and Becca Rees. We specialize in making Cricut Project Kits that you can make on your own with your Cricut, learning more about your bug in the process. You just need your Cricut Expression, the required cartridge(s), and a few basic tools. The directions come with a Cricut Cut Chart that shows you line by line exactly what you'll need to cut on your machine, with all of the settings for each cut. There are also well-organized written instructions and color photographs. We pride ourselves on our detailed designs, and on teaching others how to most effectively design with the Cricut. Currently, we have have downloadable directions on sale for only $5, and there are over 50 projects to choose from.
Counter

Grab my Button!
